Create a Defect
Raising a defect in Plexa takes under a minute and produces a record that can be assigned, tracked and signed off. This guide covers the full form, including the fields that are required before it will save.
Step By Step Guide
OPEN THE DEFECT REGISTER
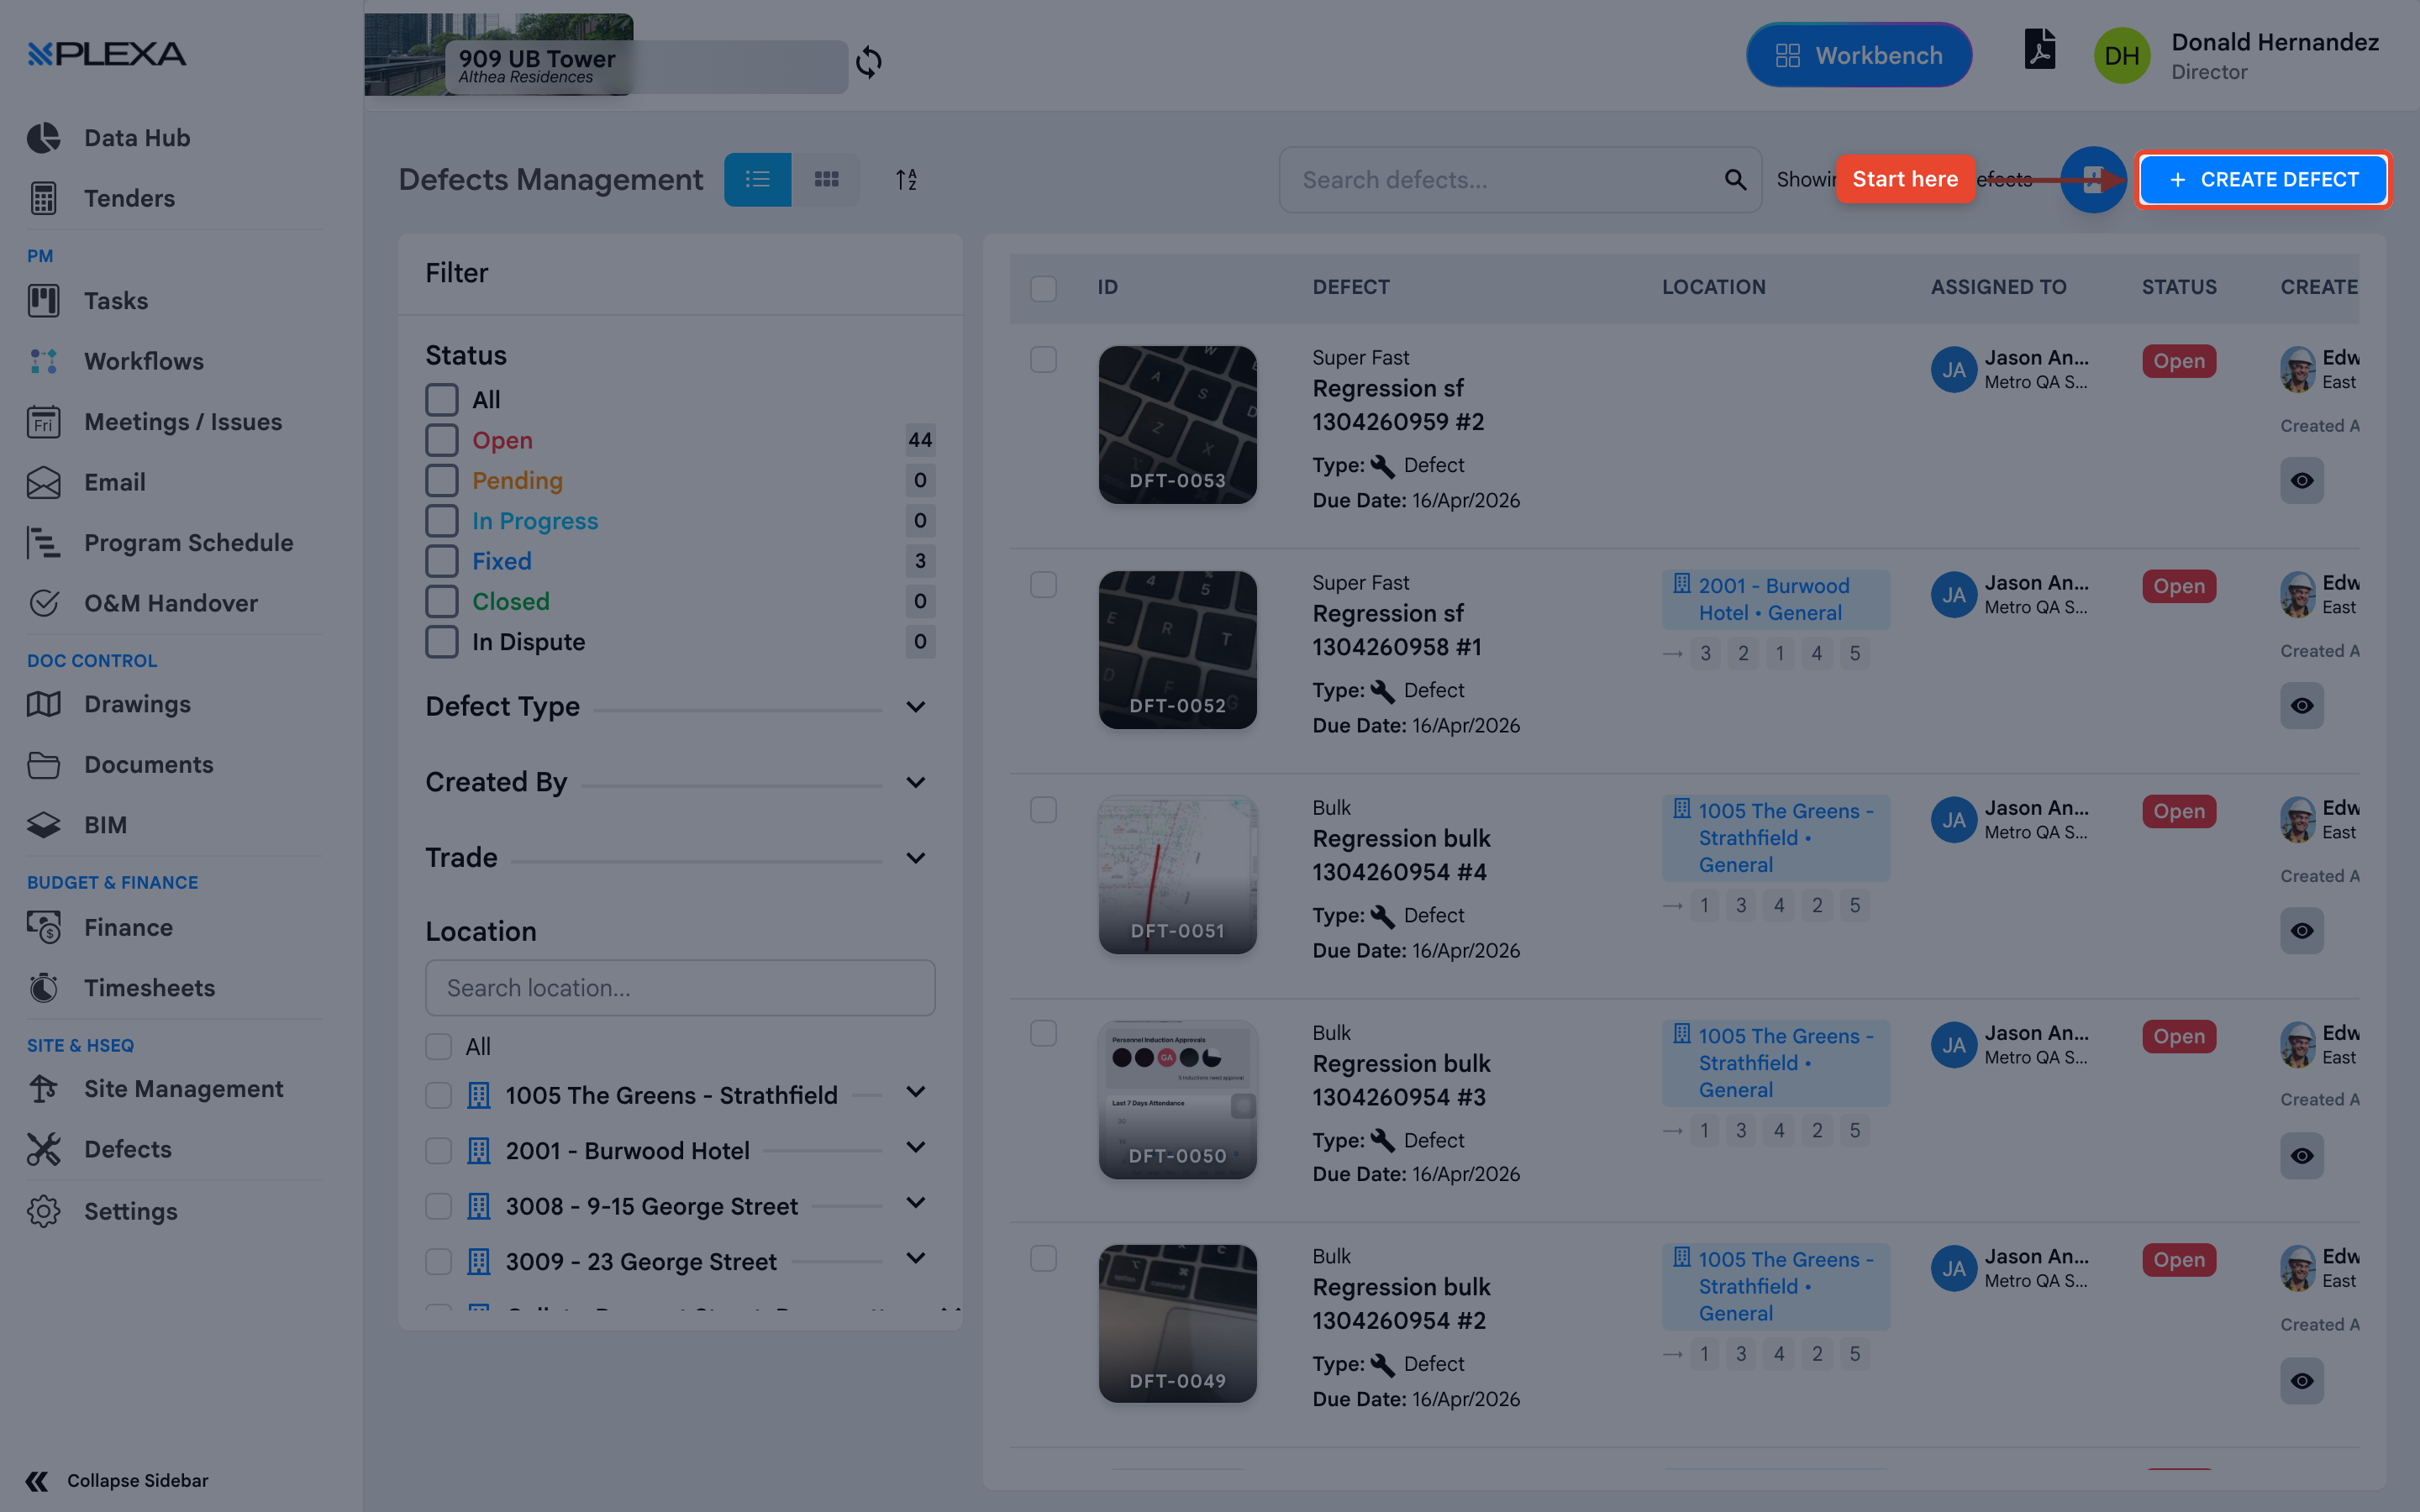
Select "Defects" in the Plexa sidebar, then select "Create Defect"
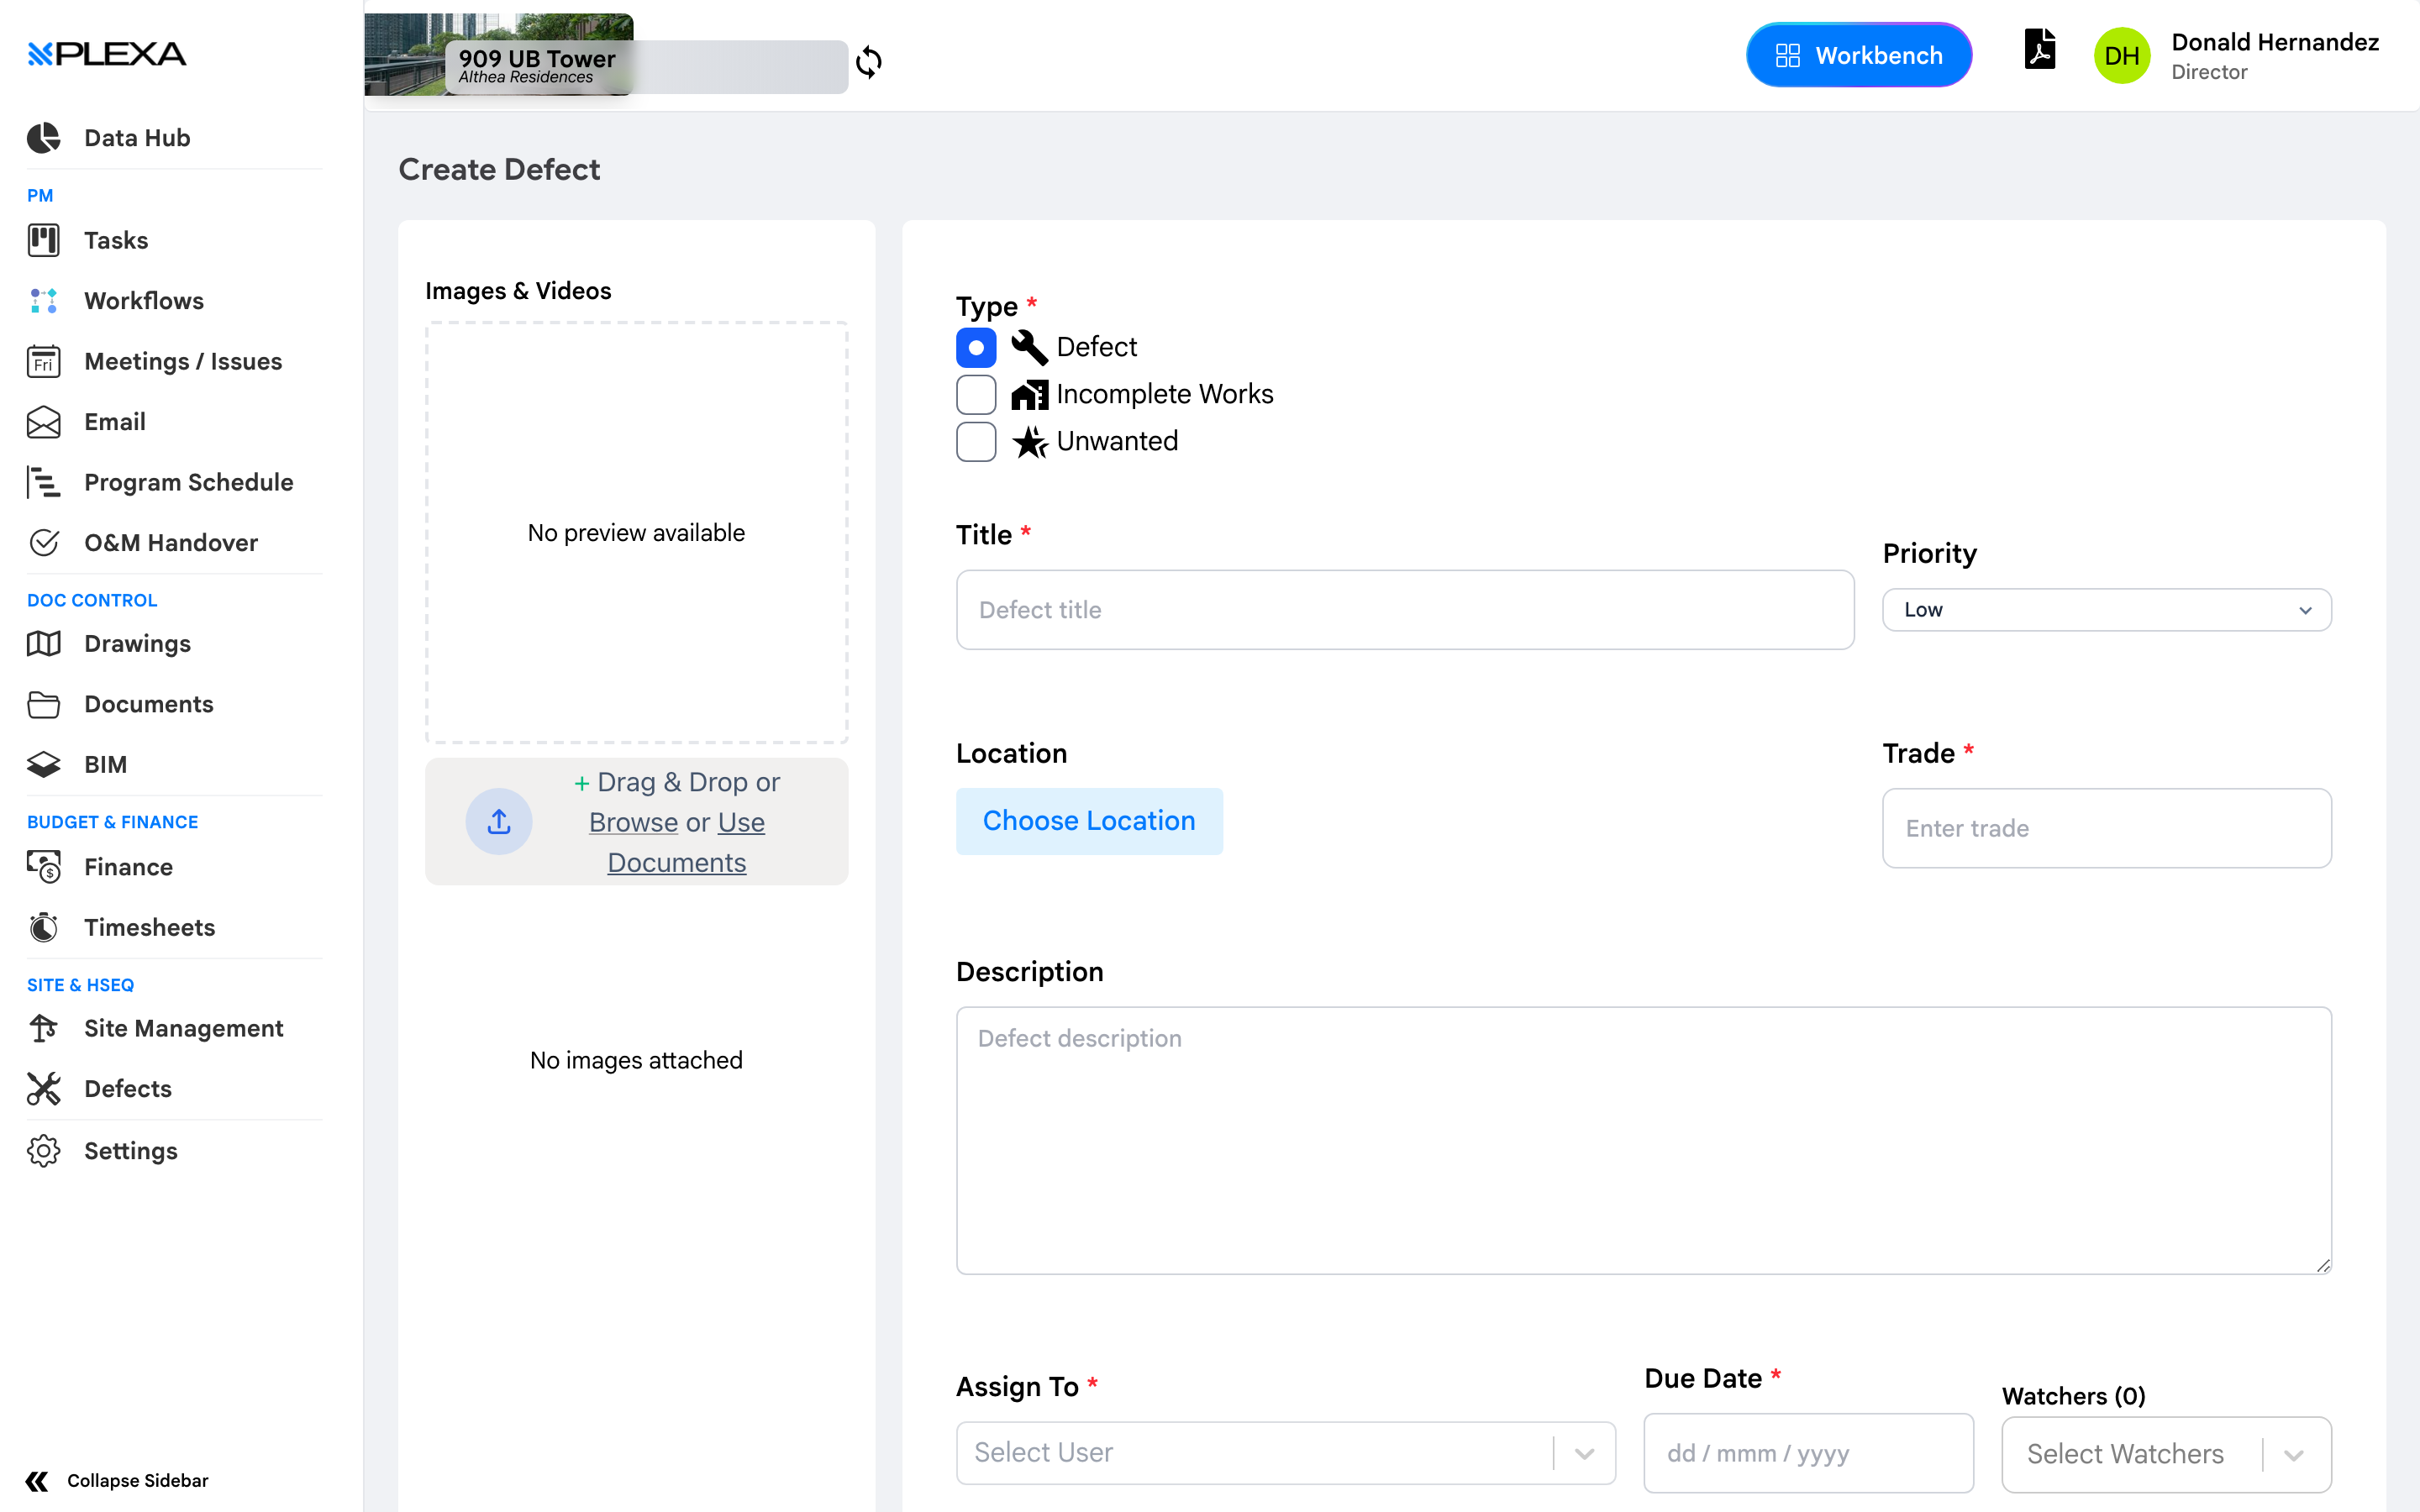
CHOOSE THE TYPE
Select "Defect", "Incomplete Works" or "Unwanted". Type is required and decides how the item is reported
DESCRIBE THE PROBLEM
- Enter a "Title" — short and specific, such as Cracked tile to ensuite floor
- Enter the "Trade" responsible
- Use "Description" for the detail a tradesperson needs on site
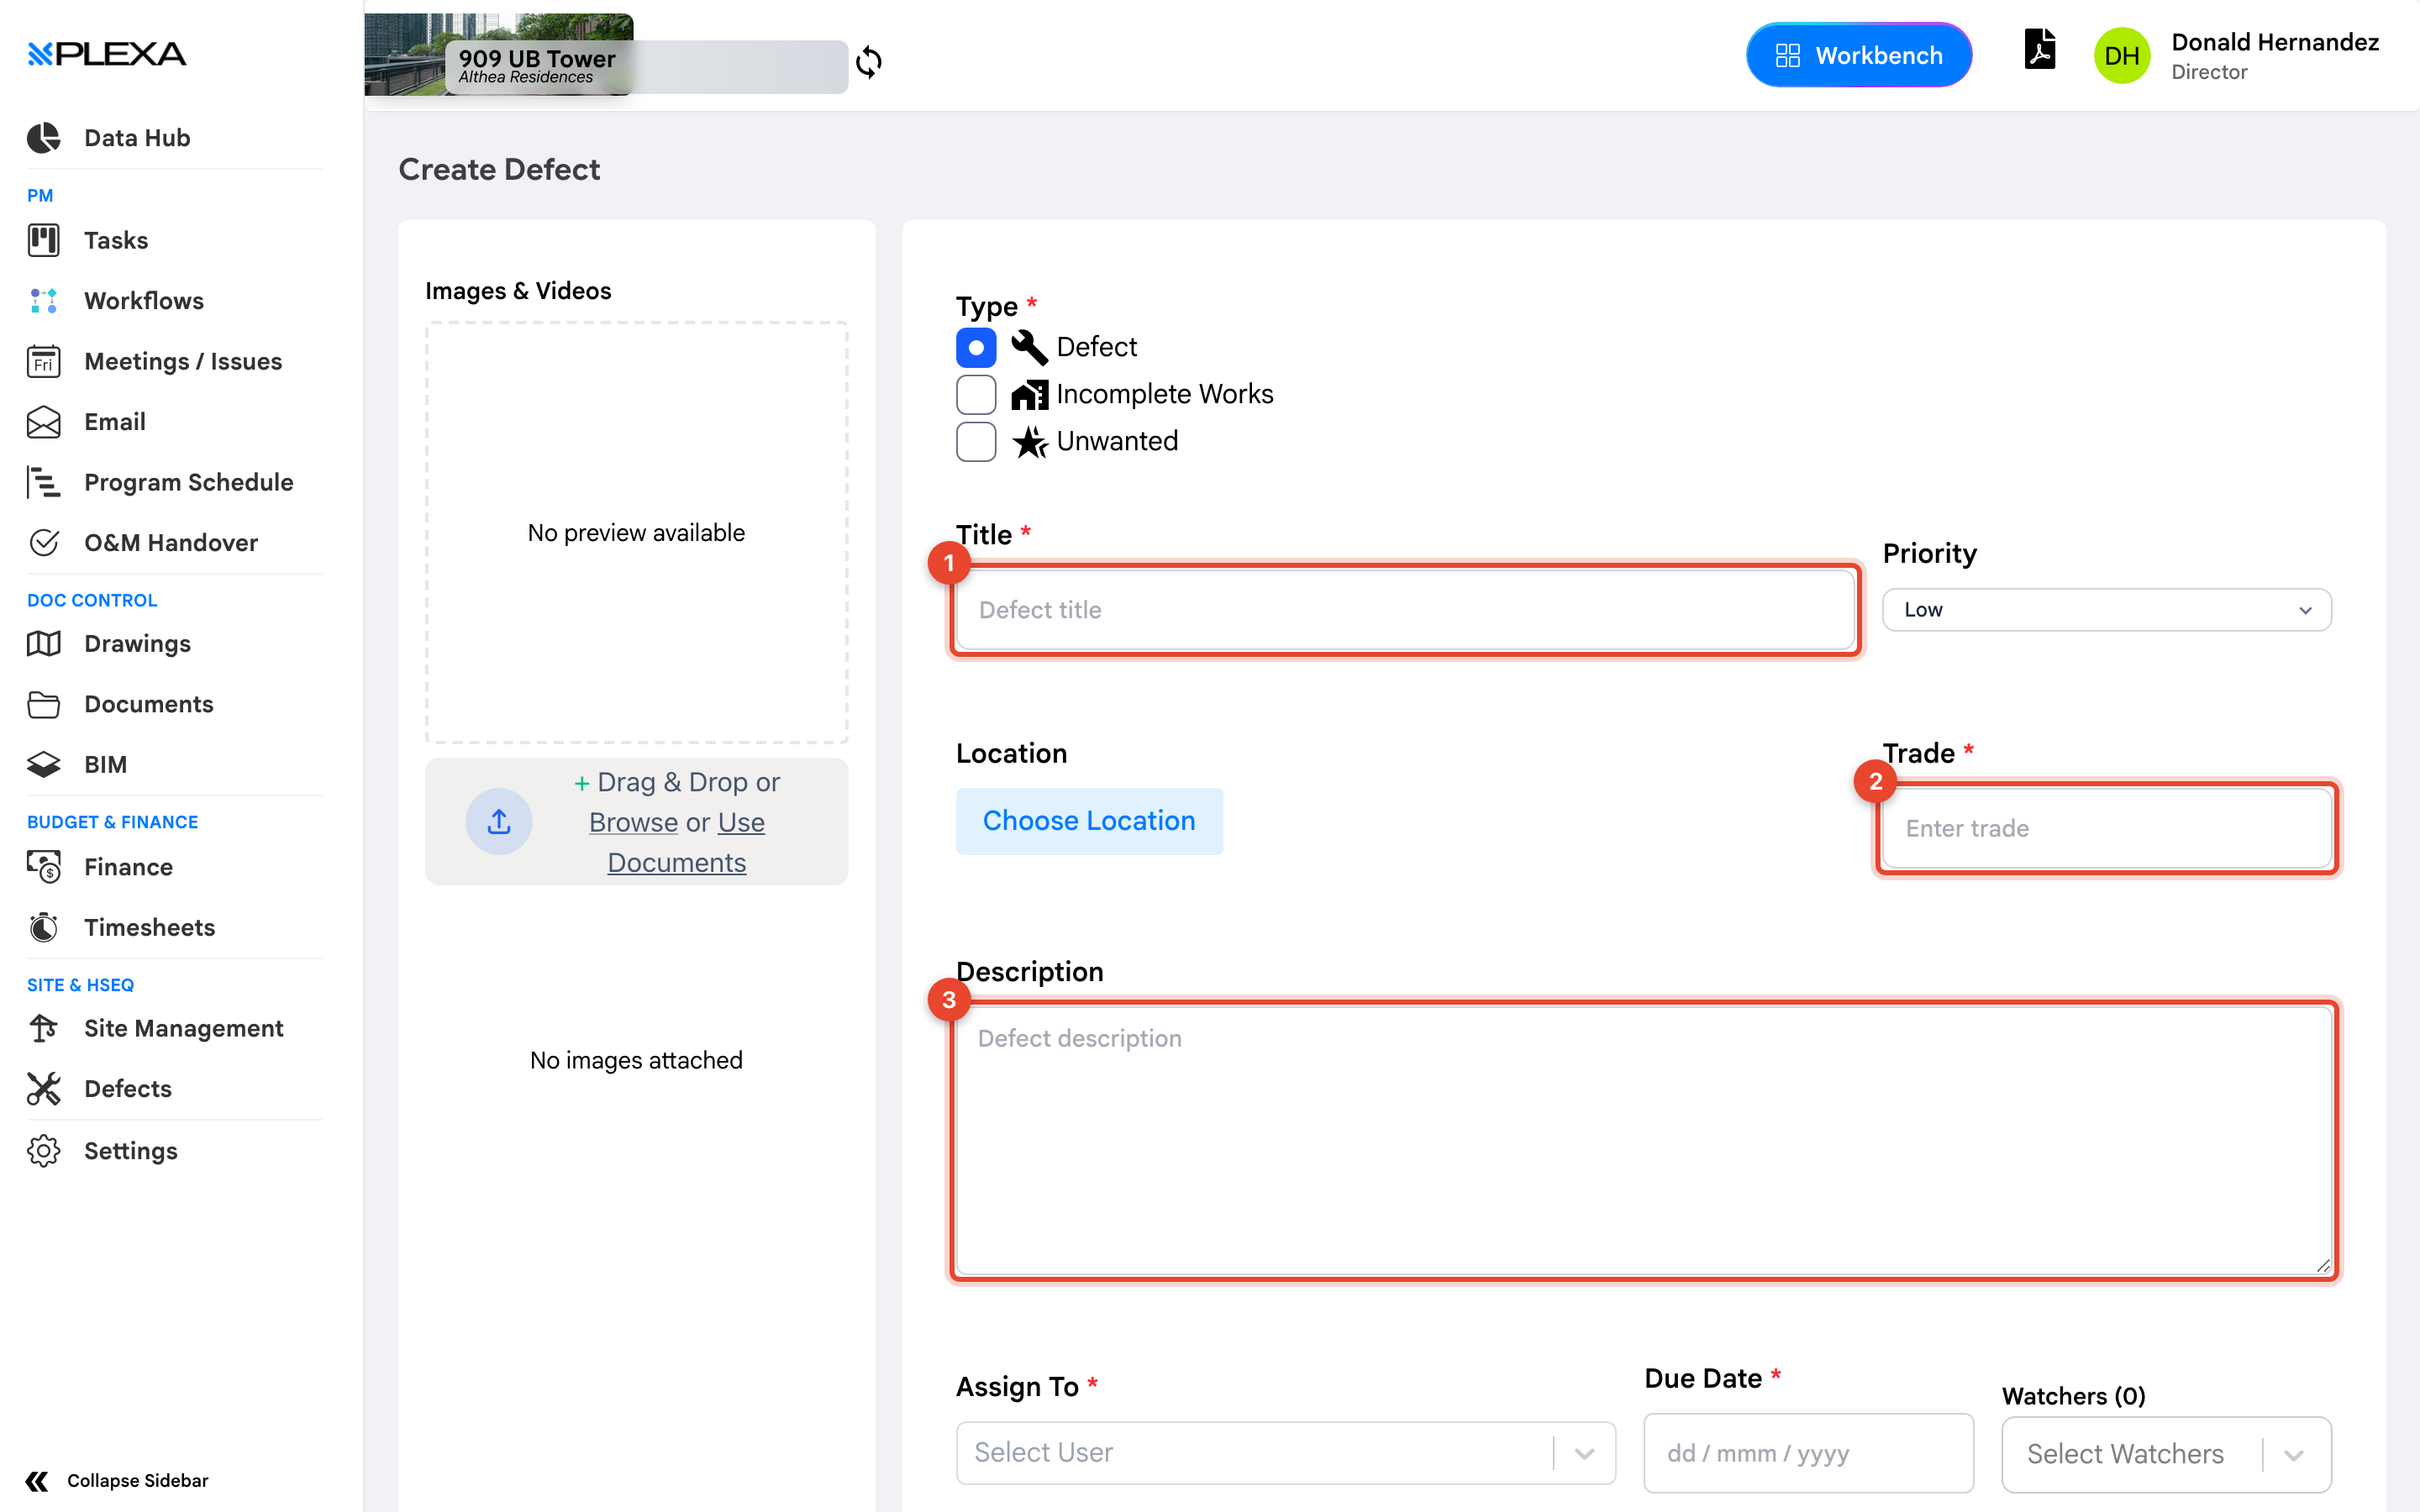
1 "Title" · 2 "Trade" · 3 "Description"
SET THE LOCATION
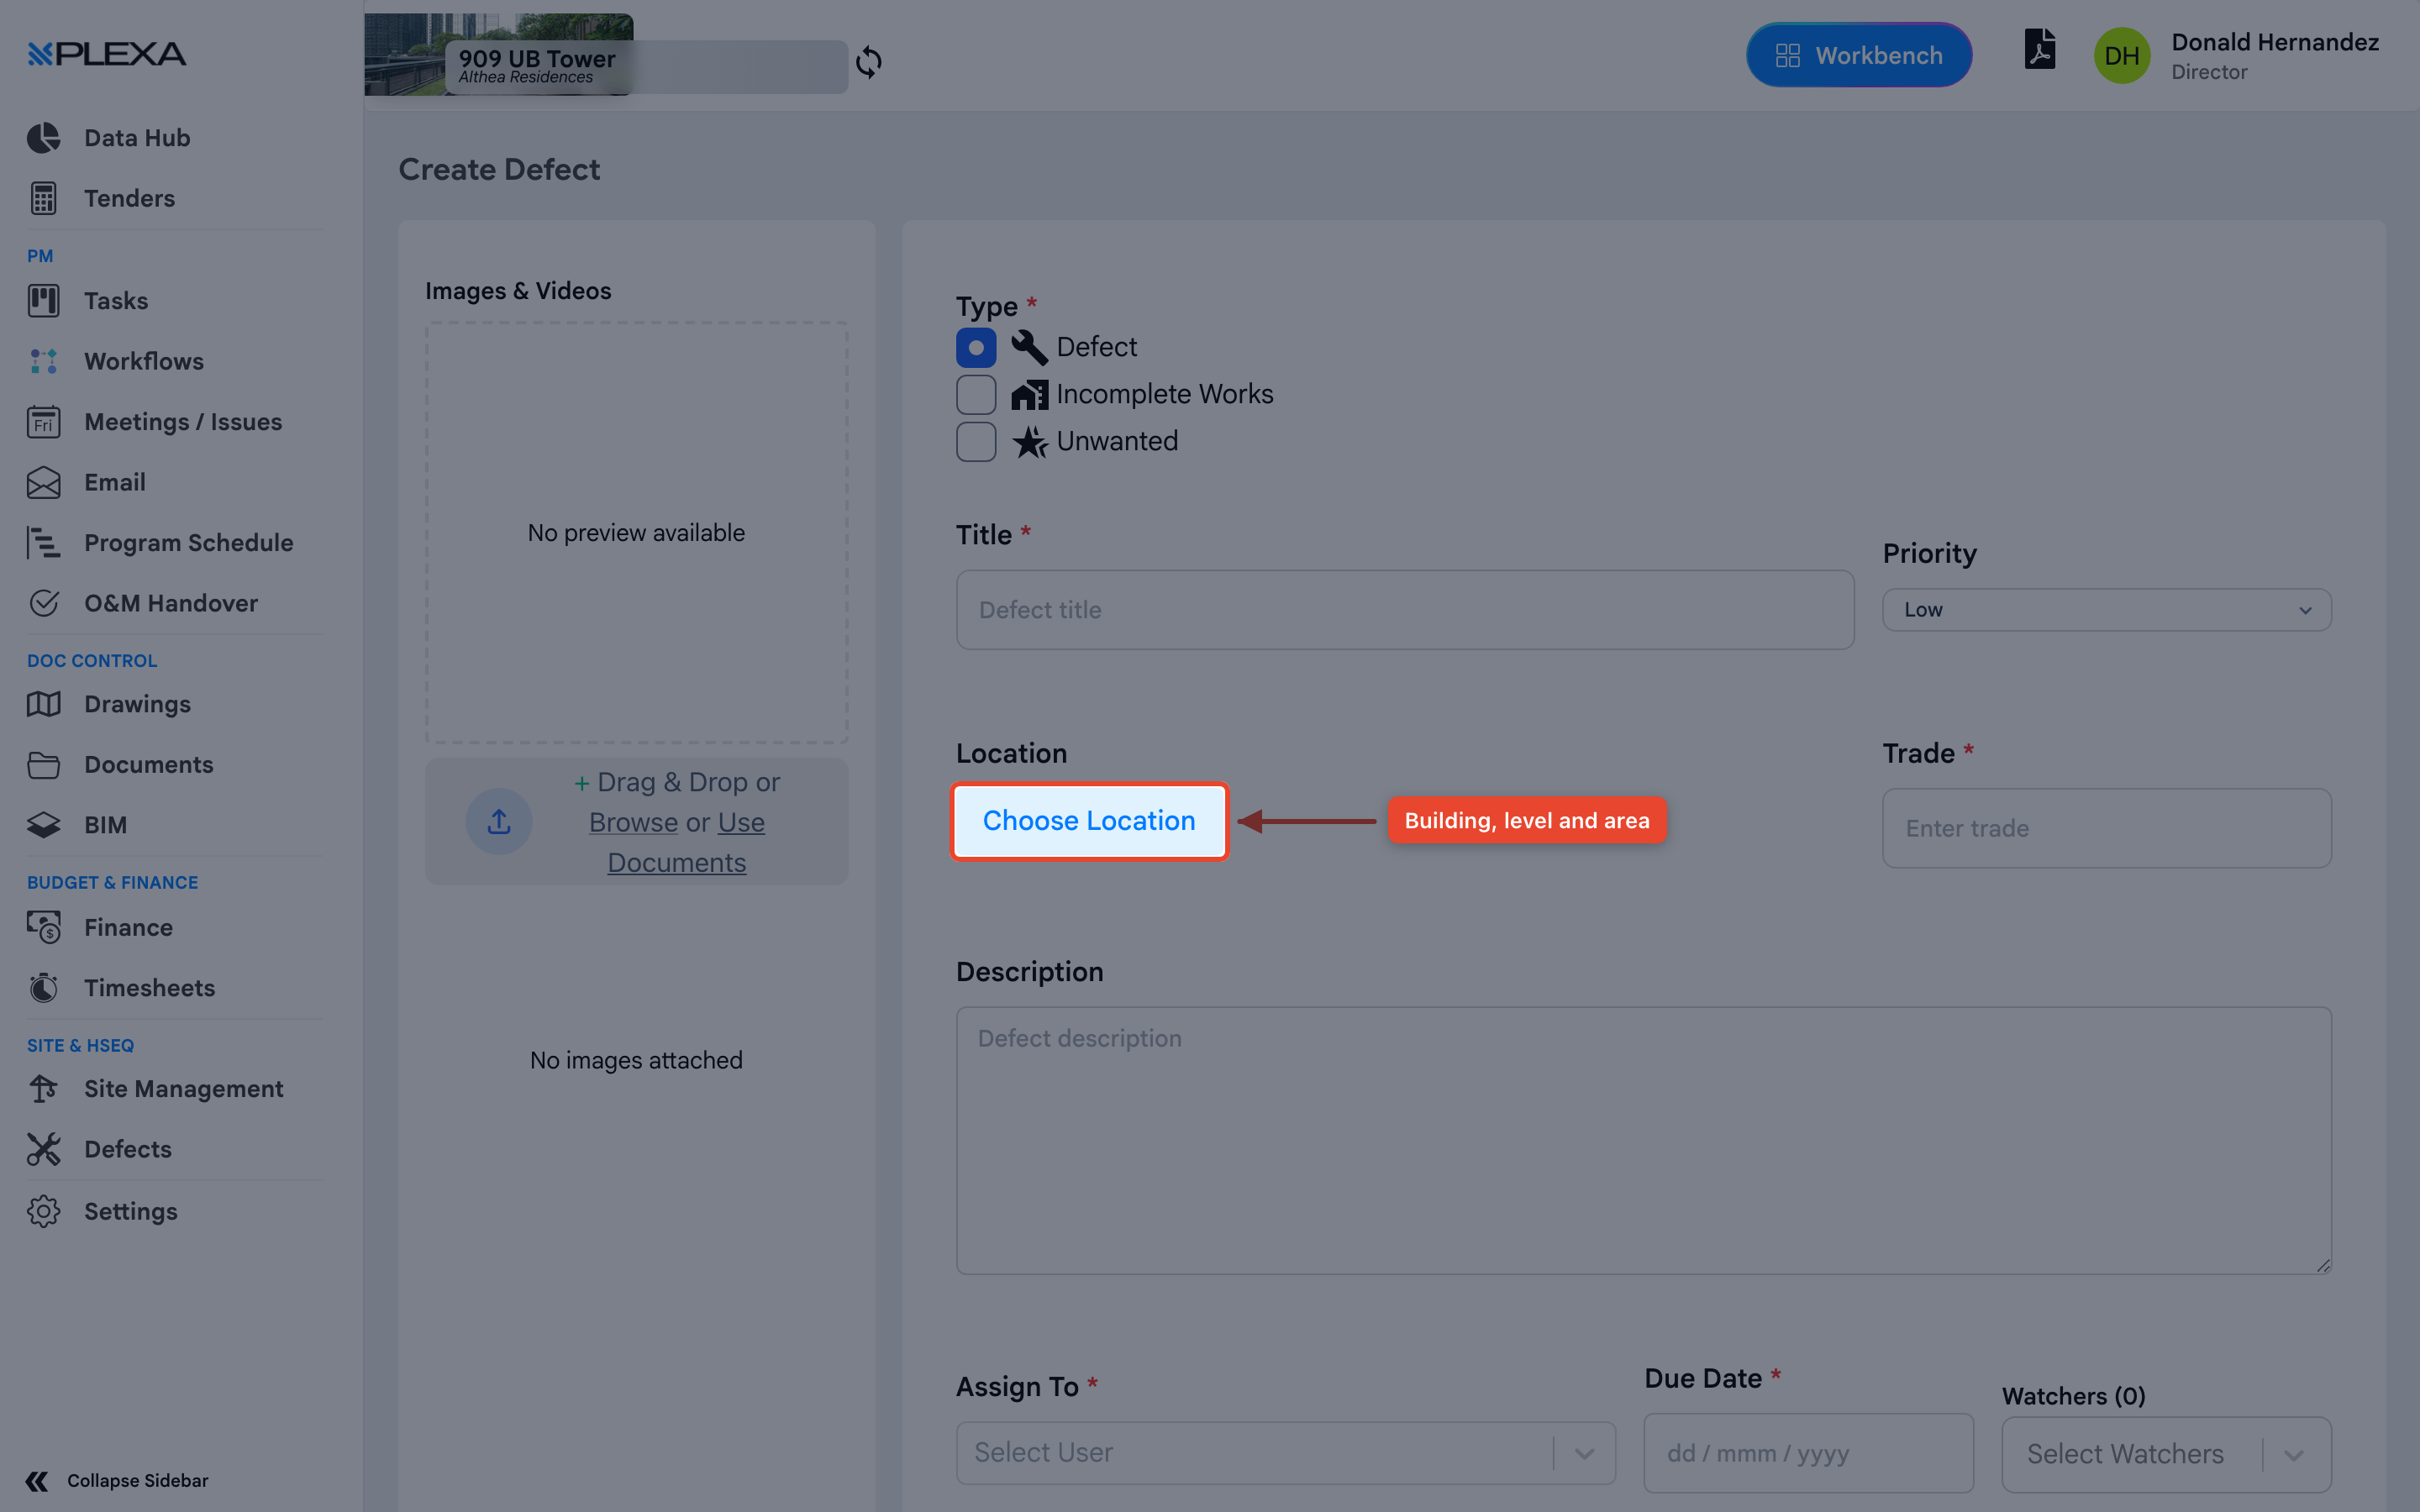
Select "Choose Location" and pick the building, level and area. Location is how defects are grouped for a site walk, so it is worth getting right
ASSIGN IT
Select the person responsible under "Assign To", set a "Due Date", and add "Watchers" for anyone who should follow progress without owning it
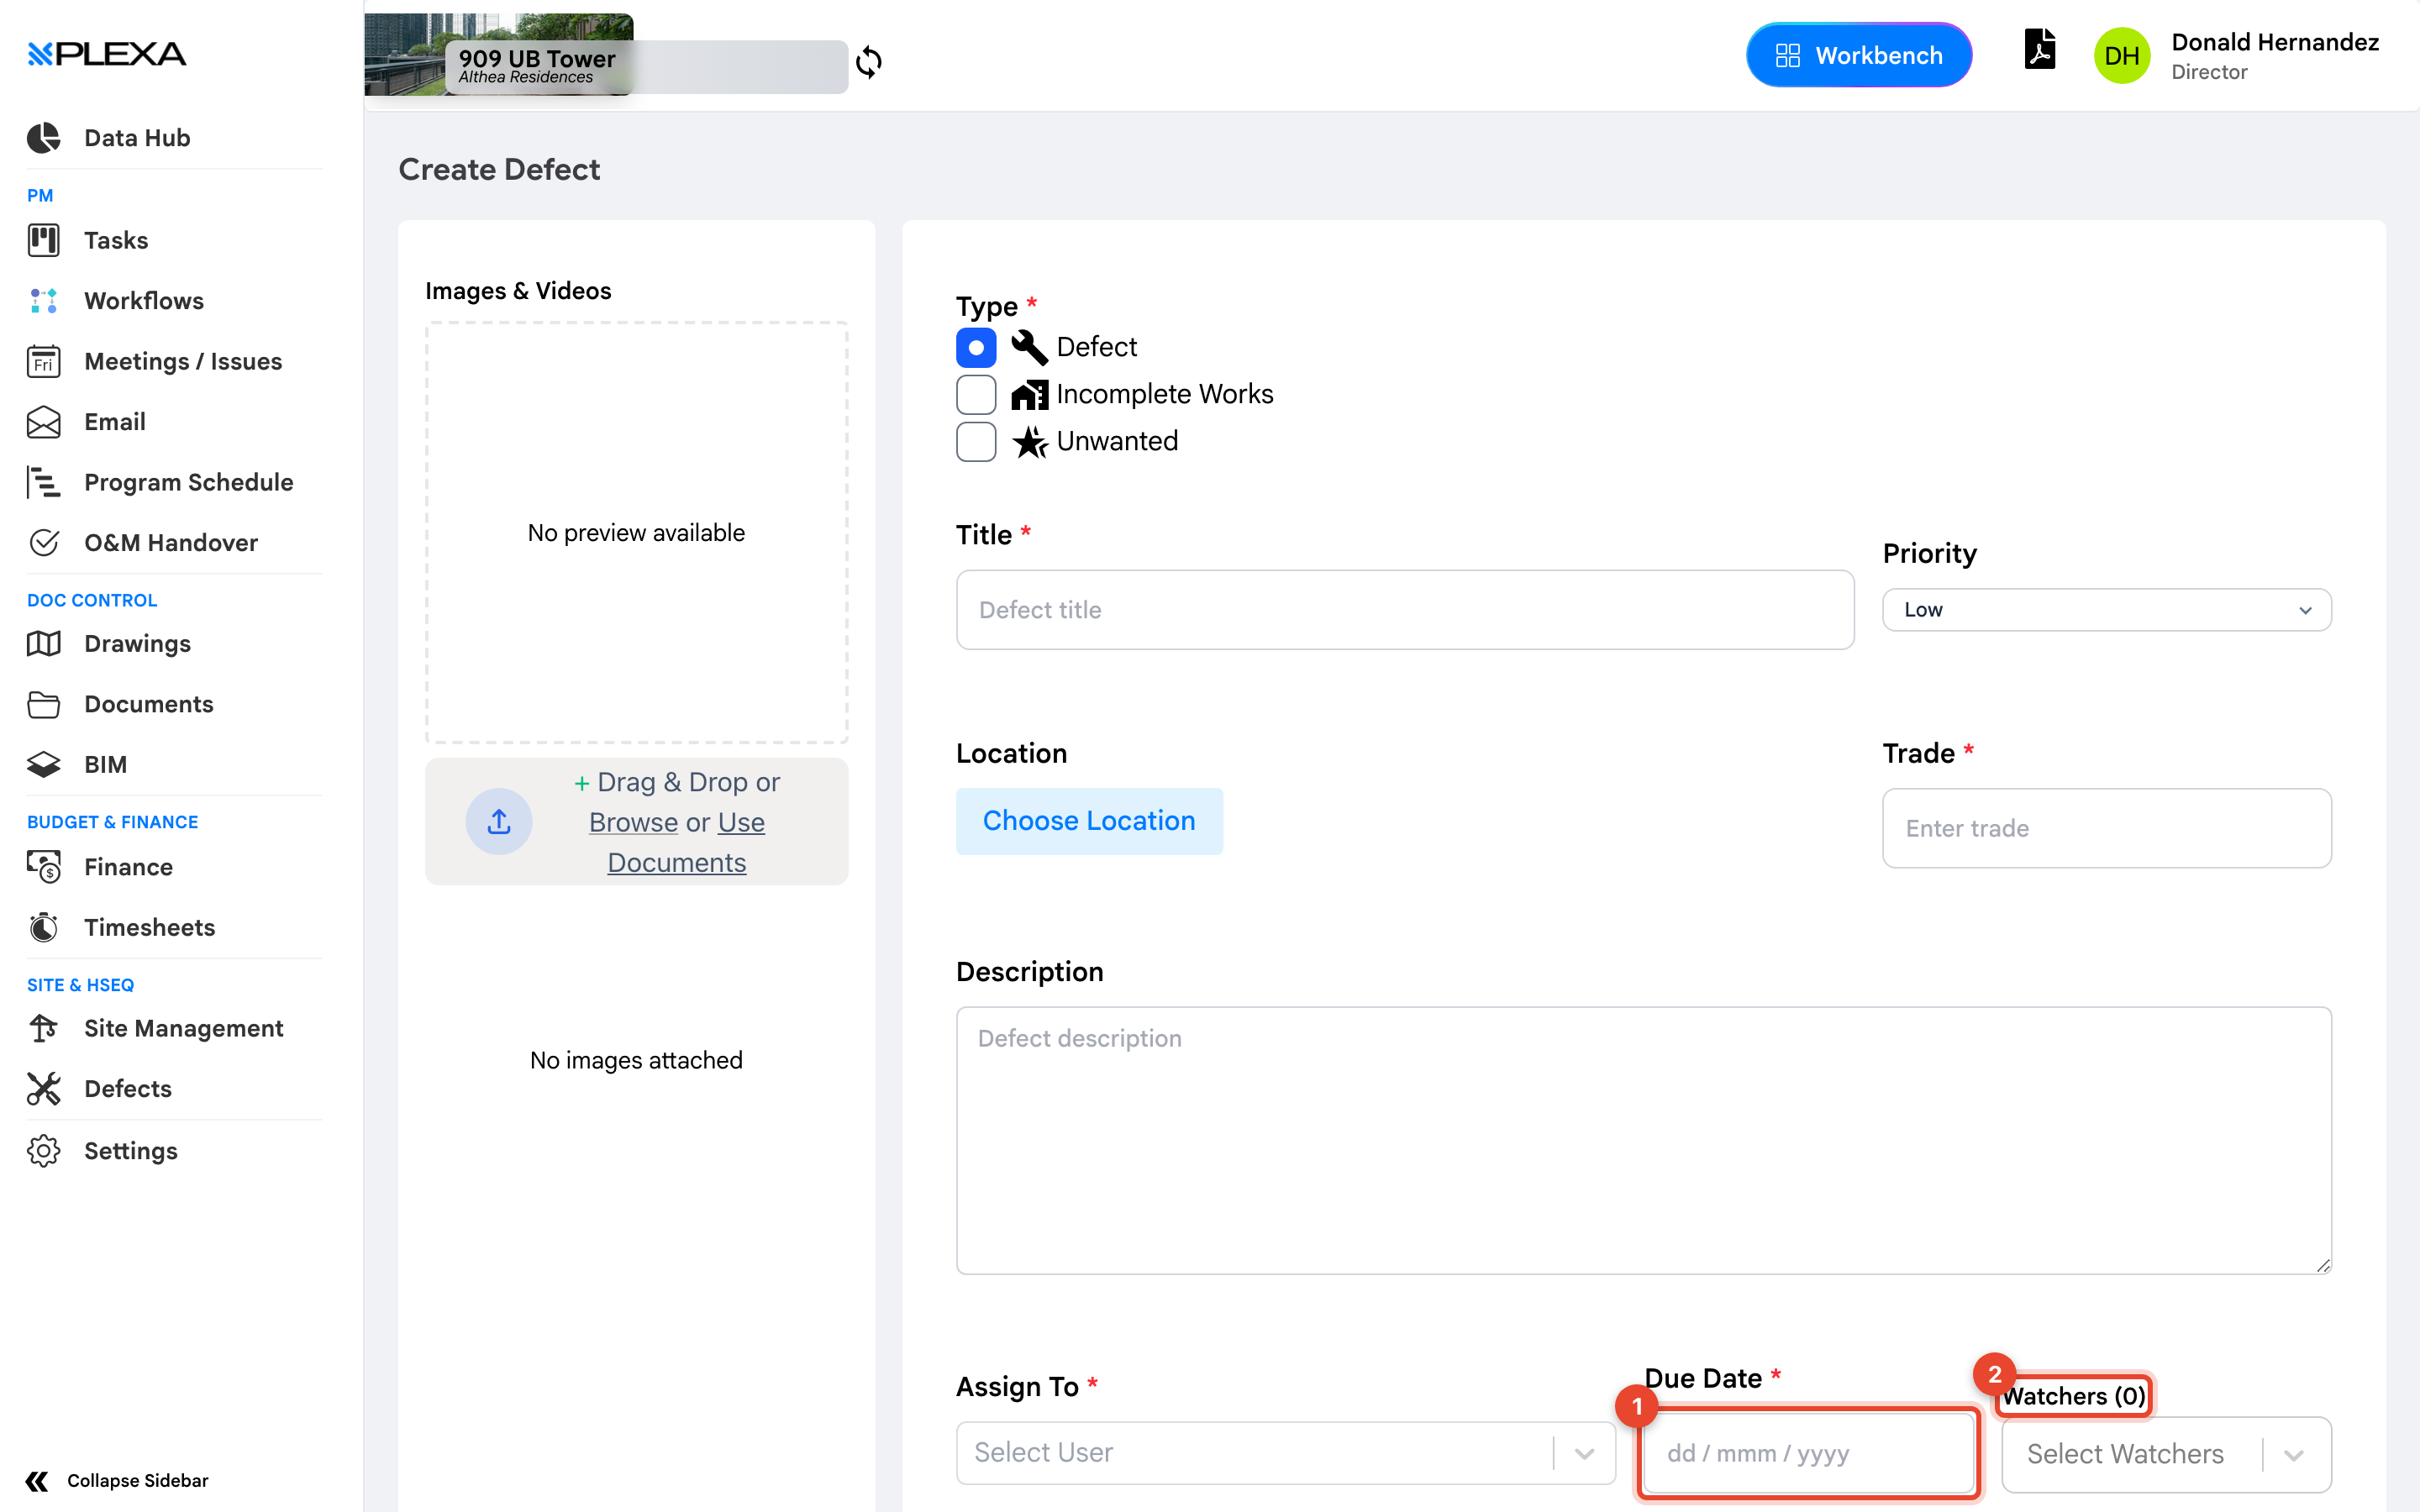
1 "Due Date" · 2 "Watchers"
ATTACH PHOTOGRAPHS
Drag files into "Images & Videos", browse for them, or select "Use Documents" to attach something already in the project
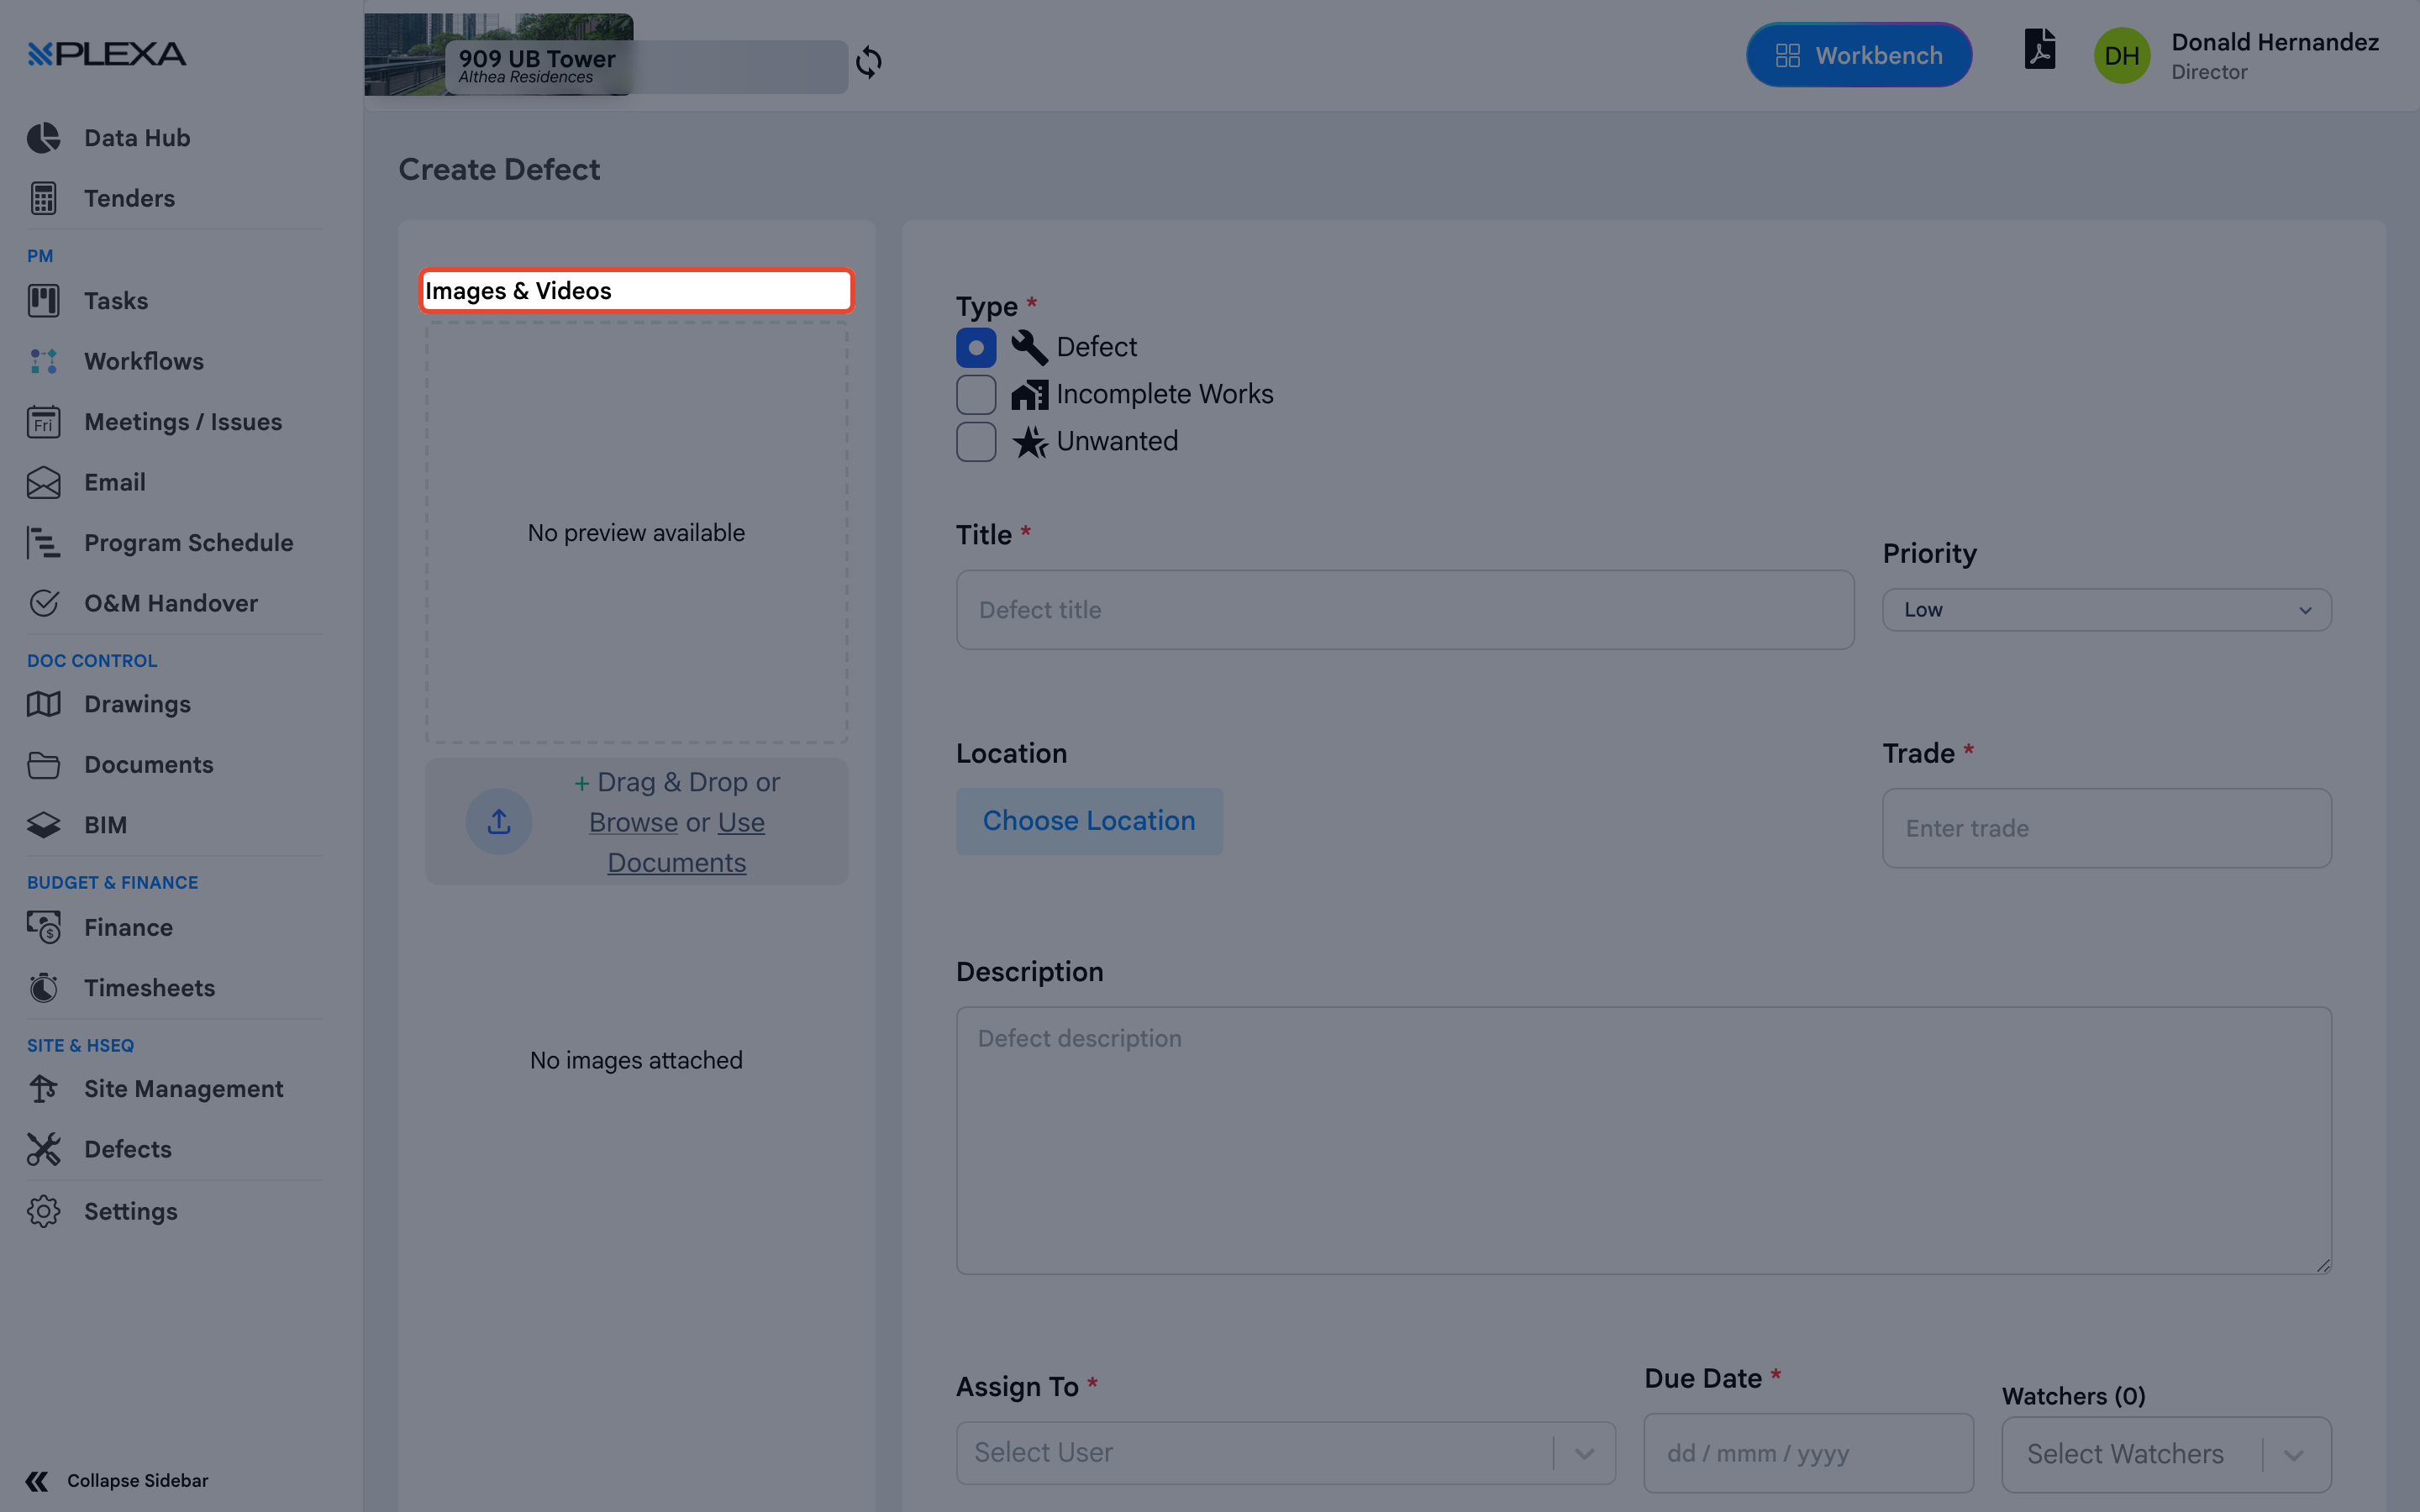
SAVE
Select "Create". The defect enters the register as Open with its own reference
1 "Create" · 2 "Cancel"
Type, Title, Trade, Assign To and Due Date are all required — marked with a red asterisk. The form will not save until each is completed.
Notes & Recommendations
- Priority defaults to "Low". Change it deliberately rather than leaving the default on something urgent
- A photograph taken at the right angle saves a return visit. Attach one before saving rather than promising to add it later
- Watchers receive updates but are not responsible for the fix — use it for supervisors rather than as a second assignee
Need More Support?
For Individual requests related to using Plexa Tools, Contact PLEXA SUPPORT
Email: support@plexapro.com
Phone: 1300 117 140
We're here to help you get the most out of Plexa.