Send Project Correspondence
Sending correspondence from Plexa files the message against the project and gives it a type and a mail number, so it forms part of the permanent record rather than sitting in one person's sent items.
Step By Step Guide
OPEN THE COMPOSER
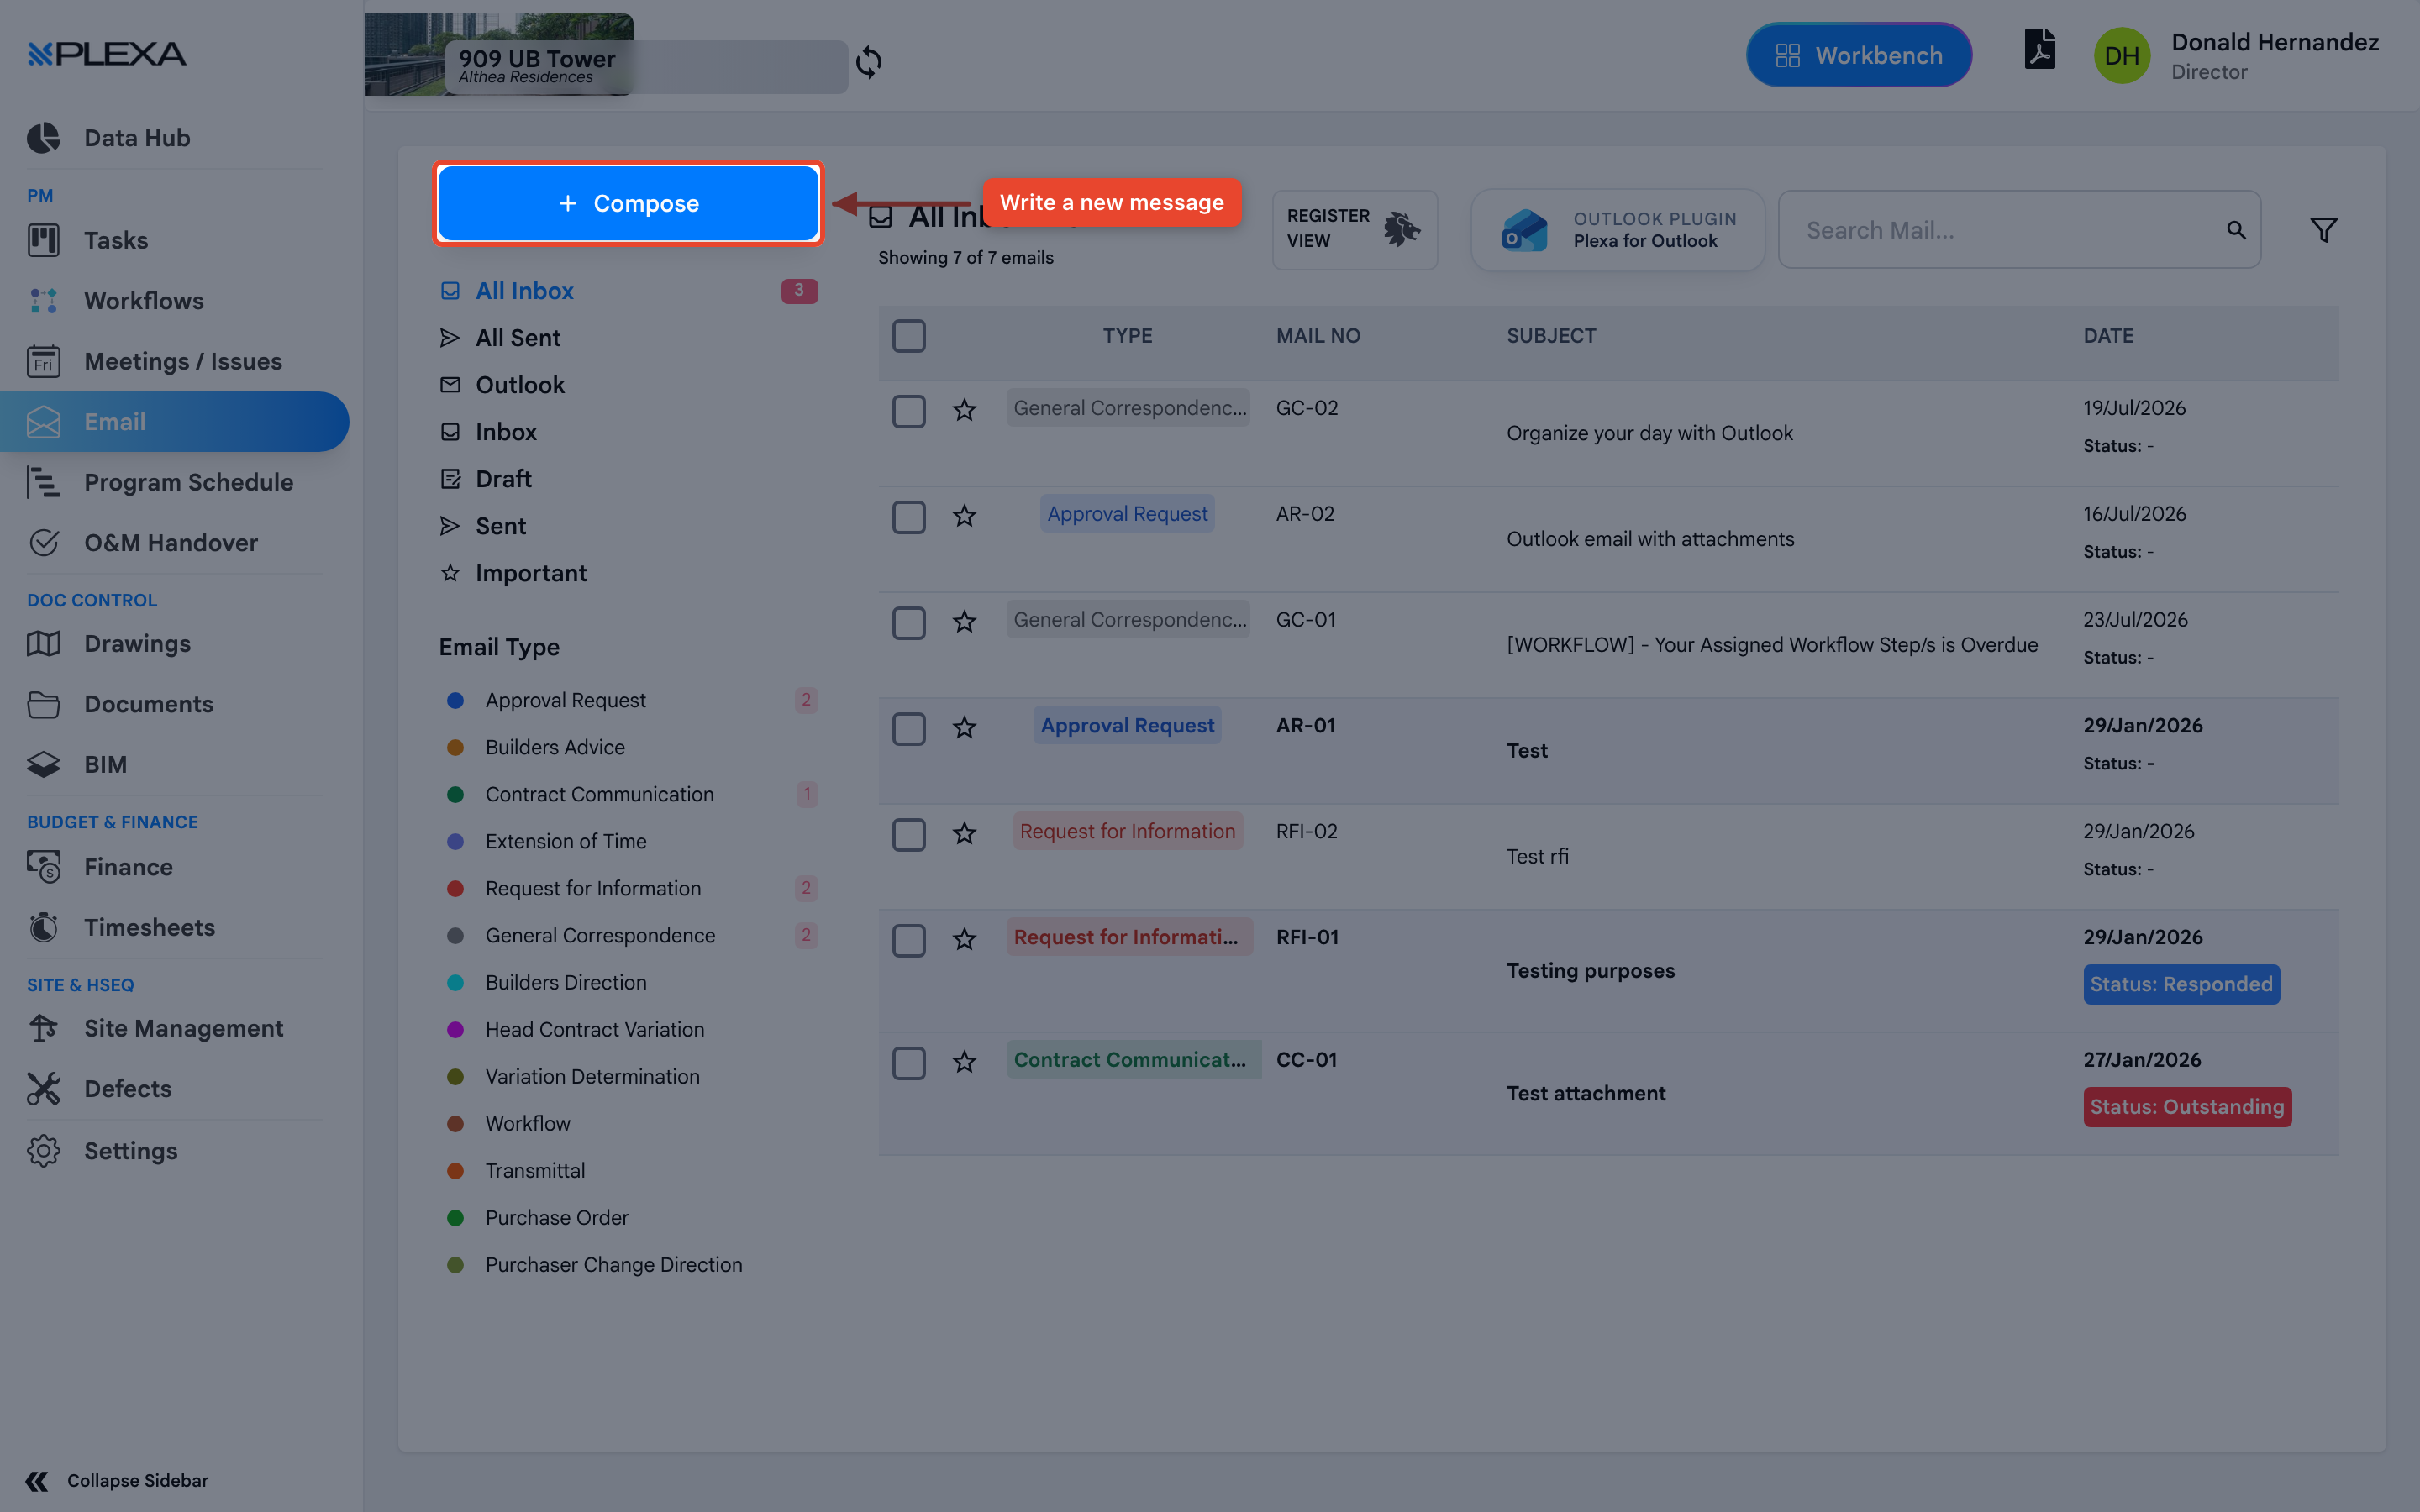
Select "Correspondence" in the Plexa sidebar, then select "Compose"
ADDRESS THE MESSAGE
Add recipients under "To", and anyone who needs a copy under "Cc". Both draw on the project directory rather than your personal contacts
WRITE IT
- Enter a "Subject"
- Write the "Body"
- Select "Templates" to start from a saved format instead of a blank message
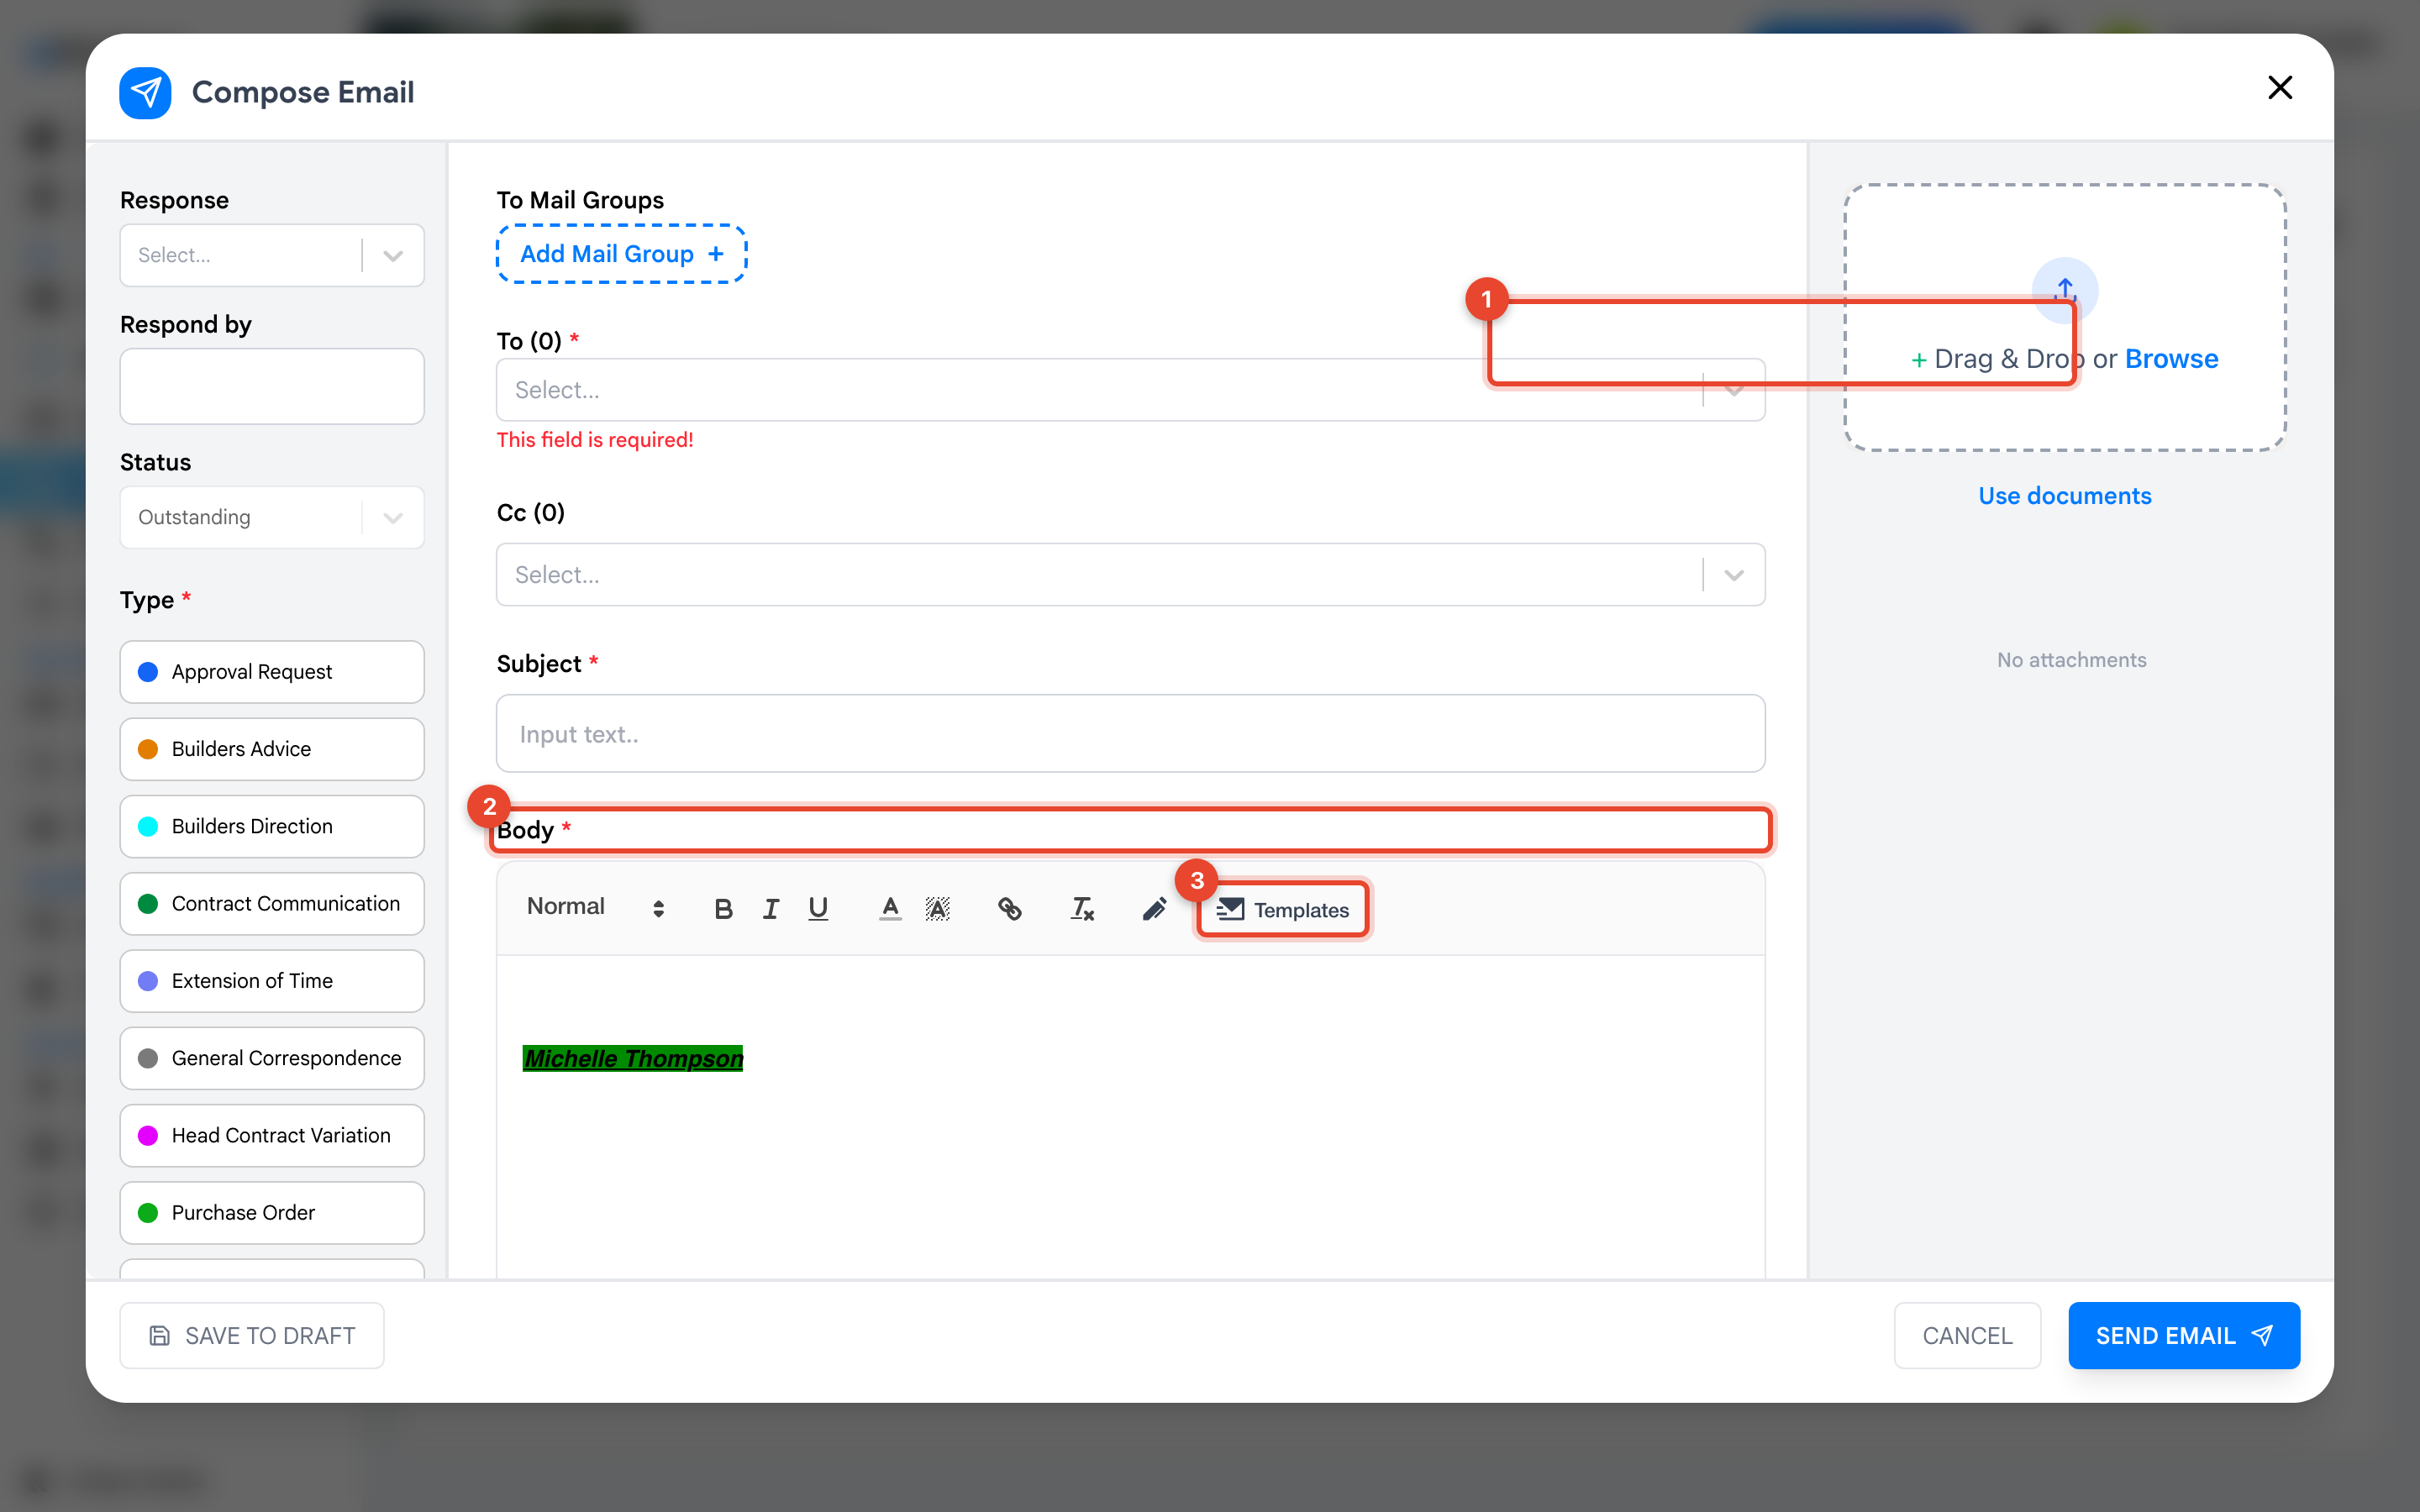
1 "Subject" · 2 "Body" · 3 "Templates"
ATTACH AND SET THE RESPONSE
Drag files into the attachment area, and set "Response", "Respond by" and "Status" where the message needs a reply by a certain date
SEND
Select "Send Email", or "Save to Draft" to finish it later
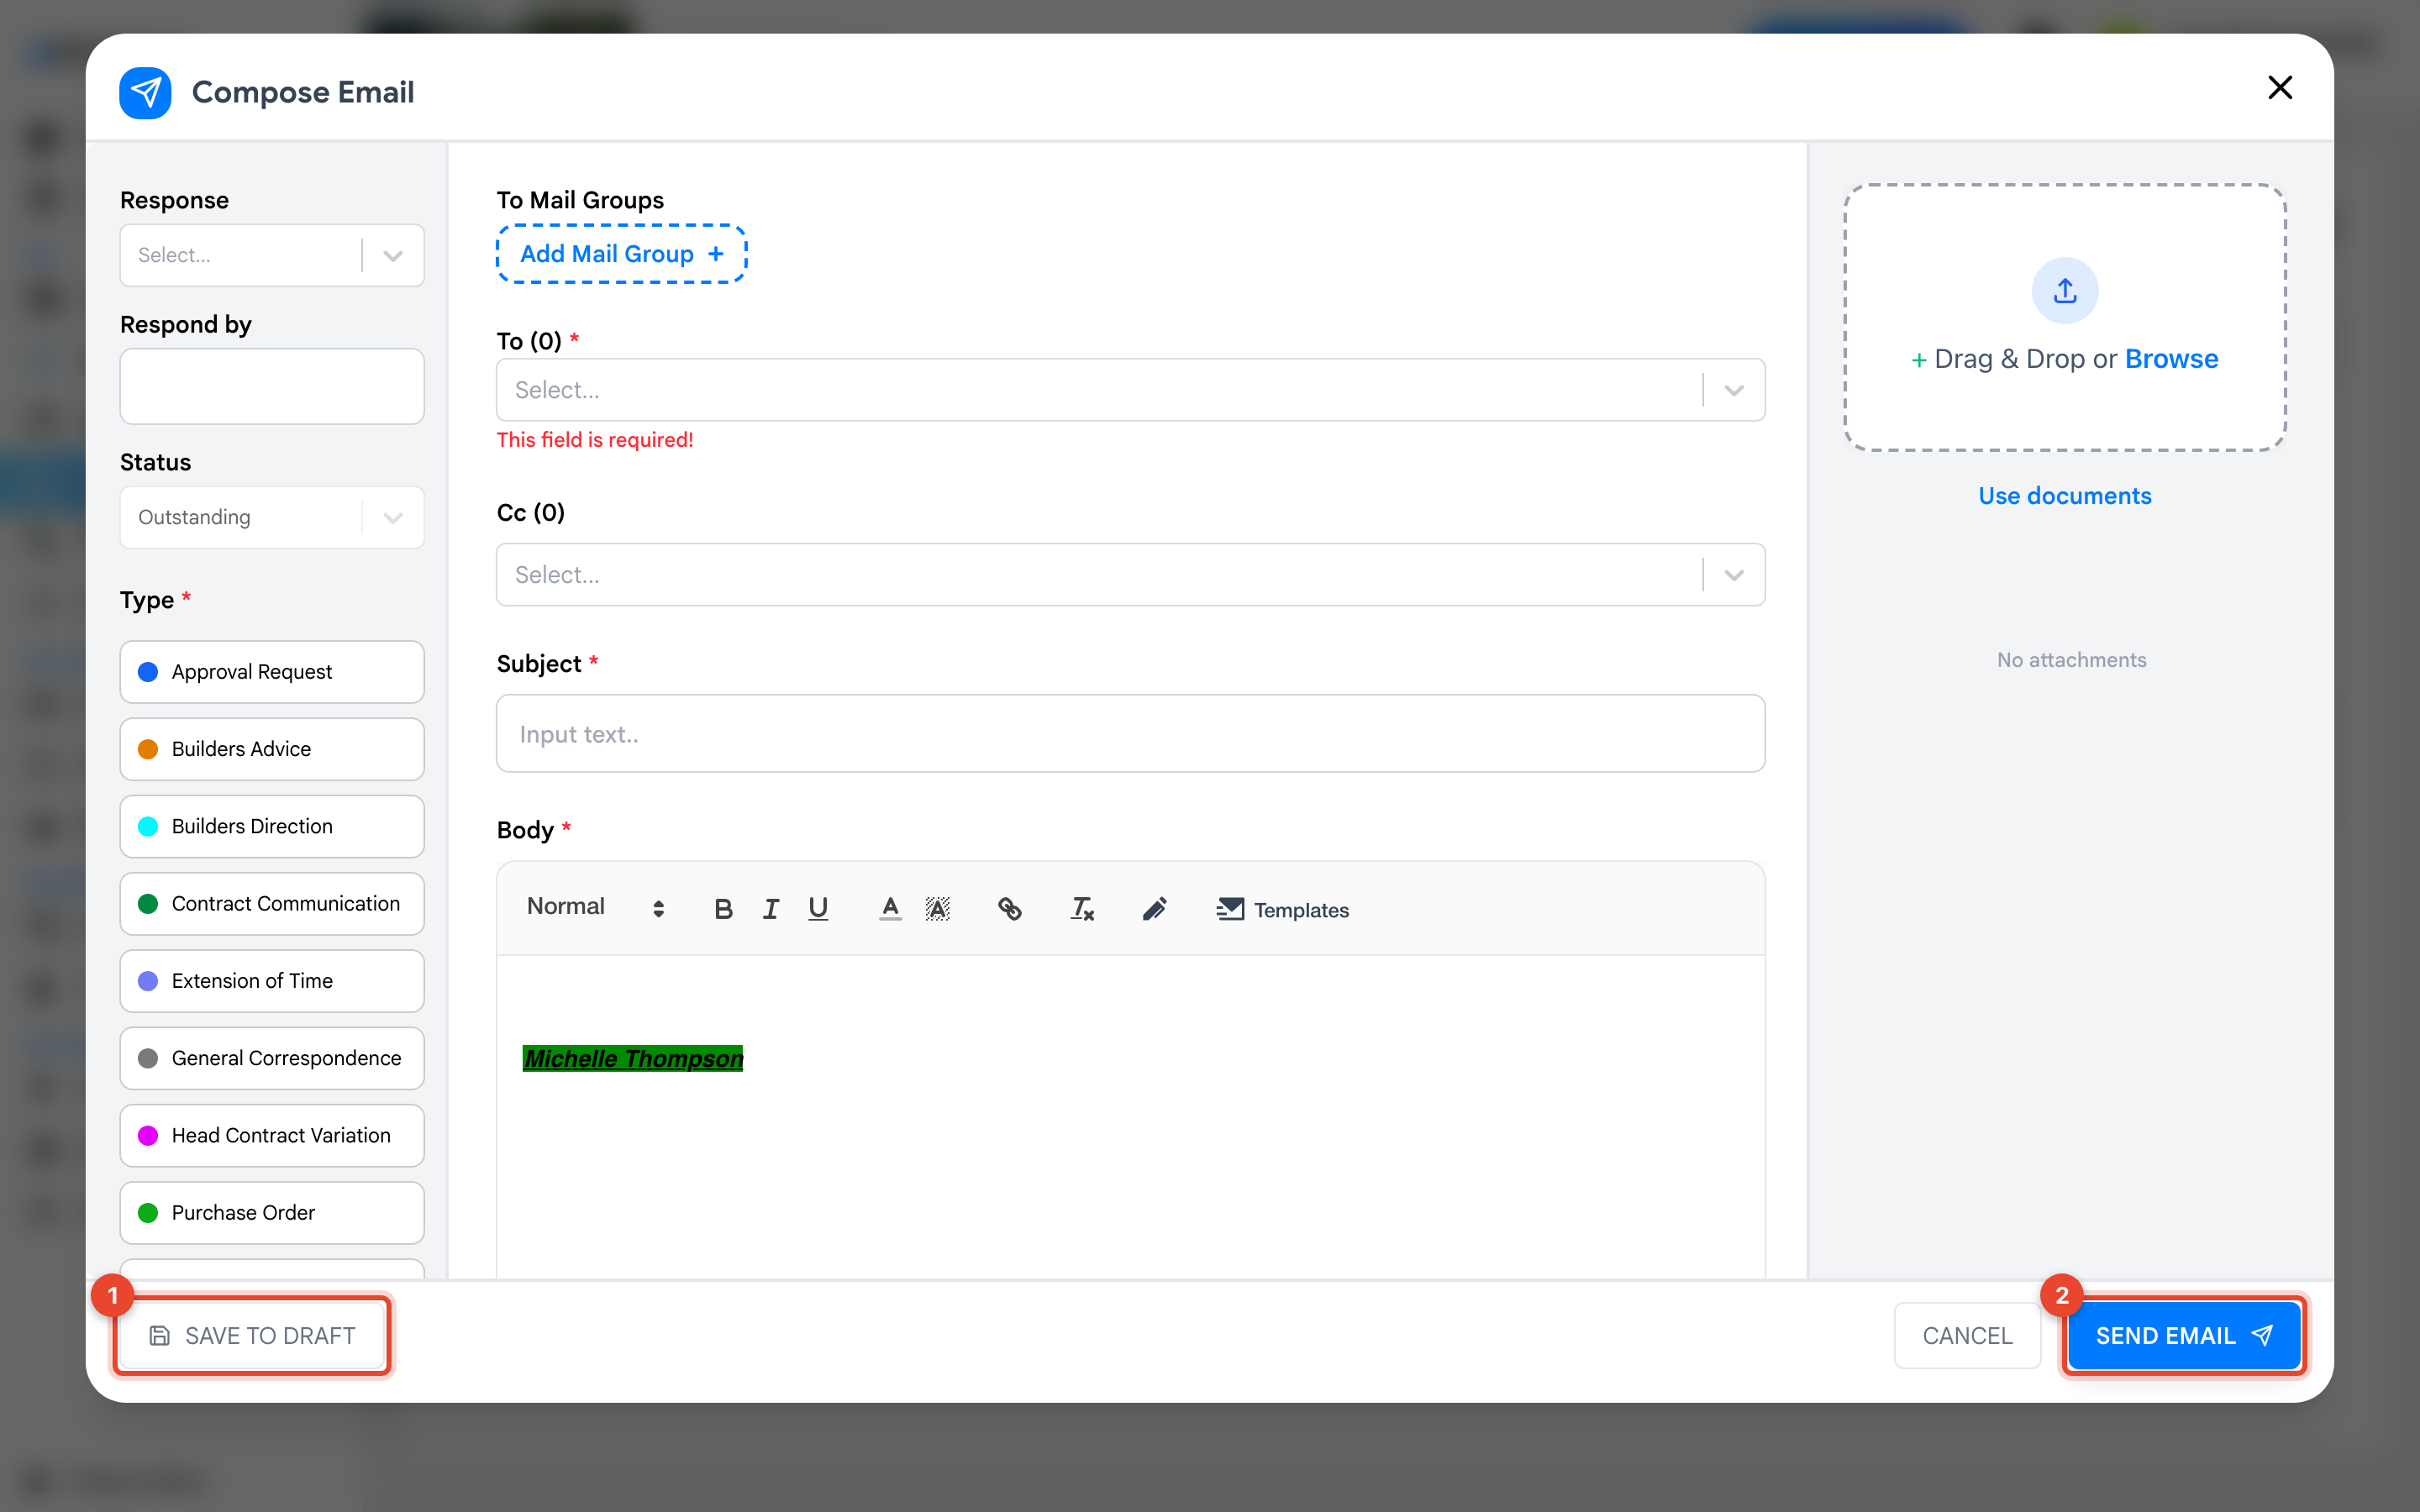
1 "Save to Draft" · 2 "Send Email"
"To", "Subject" and "Body" are required. The counters beside "To (0)" and "Cc (0)" show how many recipients you have added.
Choosing the Right Type
Correspondence is filed by type, and the type is what people filter on months later. Pick the one that matches the intent — "Request for Information", "Extension of Time", "Builders Direction", "Contract Communication" or "Transmittal" among others.
A message filed as "General Correspondence" when it is really an RFI becomes very hard to find later. The type is worth a moment's thought.
Notes & Recommendations
- Set "Respond by" when you need an answer. It is the field that makes an overdue response visible
- Sent correspondence appears in "All Sent" for the whole project, not only your own "Sent" folder
- Attach documents from the project with the attachment area rather than uploading a second copy from your computer
Need More Support?
For Individual requests related to using Plexa Tools, Contact PLEXA SUPPORT
Email: support@plexapro.com
Phone: 1300 117 140
We're here to help you get the most out of Plexa.