Two-Factor Authentication
Two-factor authentication adds a second check to sign-in: your password, then a short code from your phone. A stolen or guessed password is no longer enough on its own, which matters on a platform holding contracts, costs and site records.
Plexa calls this MFA — multi-factor authentication. Whether you use it is decided by your organisation's Plexa Admin, not by you individually.
What You Will See at Sign-In
Once MFA is switched on for you, signing in gains one extra step. After your email and password, Plexa asks for a code.
What it asks for depends on the method your organisation has chosen:
- Authenticator app — "Enter the code from your authenticator app."
- SMS — "Enter the code sent to your phone via SMS."
- Either — "Enter the code from your two-factor authenticator app or SMS."
If you have lost your device, you can enter one of your recovery codes instead of a six-digit code.
Set Up an Authenticator App
The first time you sign in after MFA is enabled, Plexa walks you through enrolment before letting you in.
SCAN THE QR CODE
Open your authenticator app and scan the QR code Plexa shows. If you cannot scan it, enter the secret key displayed beneath it by hand
CONFIRM IT WORKS
Enter your Plexa password and the code your app is showing, then continue
SAVE YOUR RECOVERY CODES
Plexa shows a list of recovery codes and asks you to confirm you have saved them. This is the only time they are shown
Save your recovery codes somewhere you can reach without your phone — a password manager, or printed and kept securely. They are what gets you back in if your device is lost.
Any standard authenticator app works, since Plexa uses the usual time-based code standard.
Using SMS Instead
If your organisation uses SMS, Plexa sends a code to your registered mobile. If it does not yet have a number for you, it asks for one at sign-in.
Codes can be resent after a short countdown. Because SMS depends on signal, an authenticator app is the more reliable choice on site where reception is poor.
For Plexa Admins
MFA is configured under "Settings" → "MFA Settings", and covers internal and external users separately.
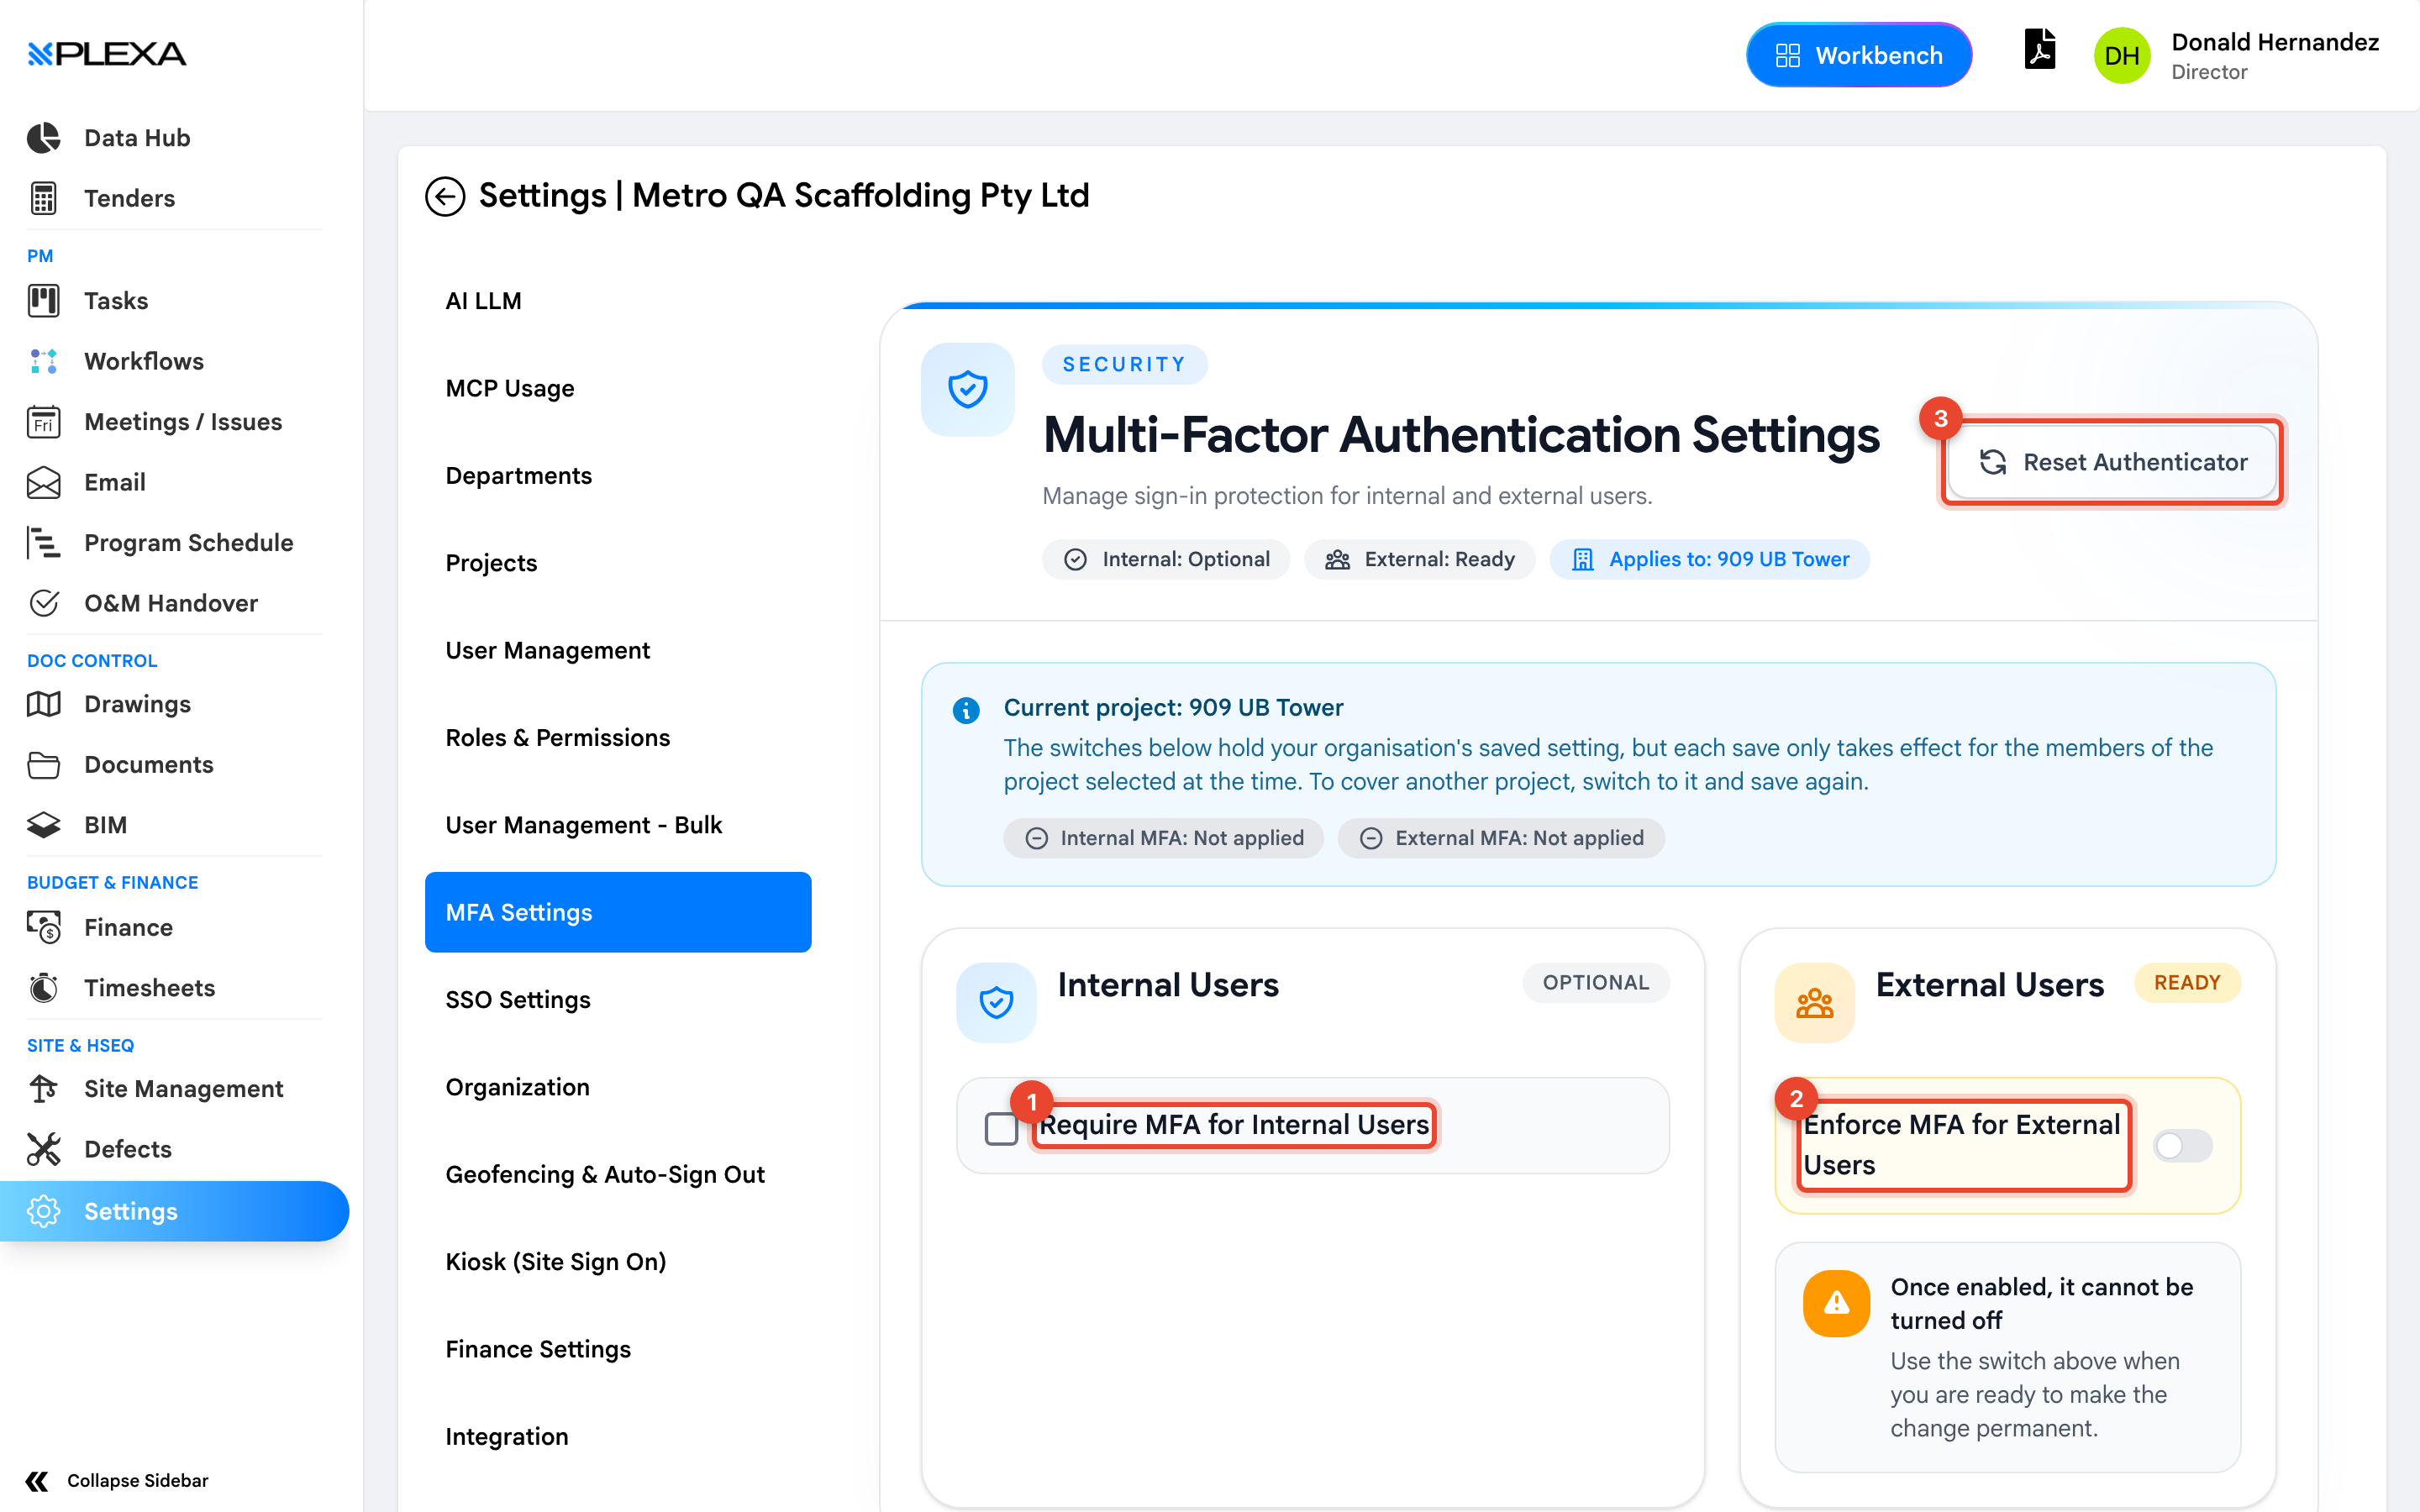
1 "Require MFA for Internal Users" · 2 "Enforce MFA for External Users" · 3 "Reset Authenticator"
- Internal Users — your own organisation's staff. Choose "SMS Only", "Authenticator App", or "SMS or Authenticator" to let each person pick
- External Users — invited subcontractors and other outside accounts
- Reset Authenticator — clears a user's enrolment by email address, so someone who has lost their device and their recovery codes can enrol again
Enforcing MFA for external users cannot be undone. The page states plainly that once enabled, it cannot be turned off — treat that switch as permanent.
Settings Apply Per Project
This is the part that surprises people. The switches hold your organisation's saved setting, but each save only takes effect for members of the project selected at the time. To cover another project, switch to it and save again.
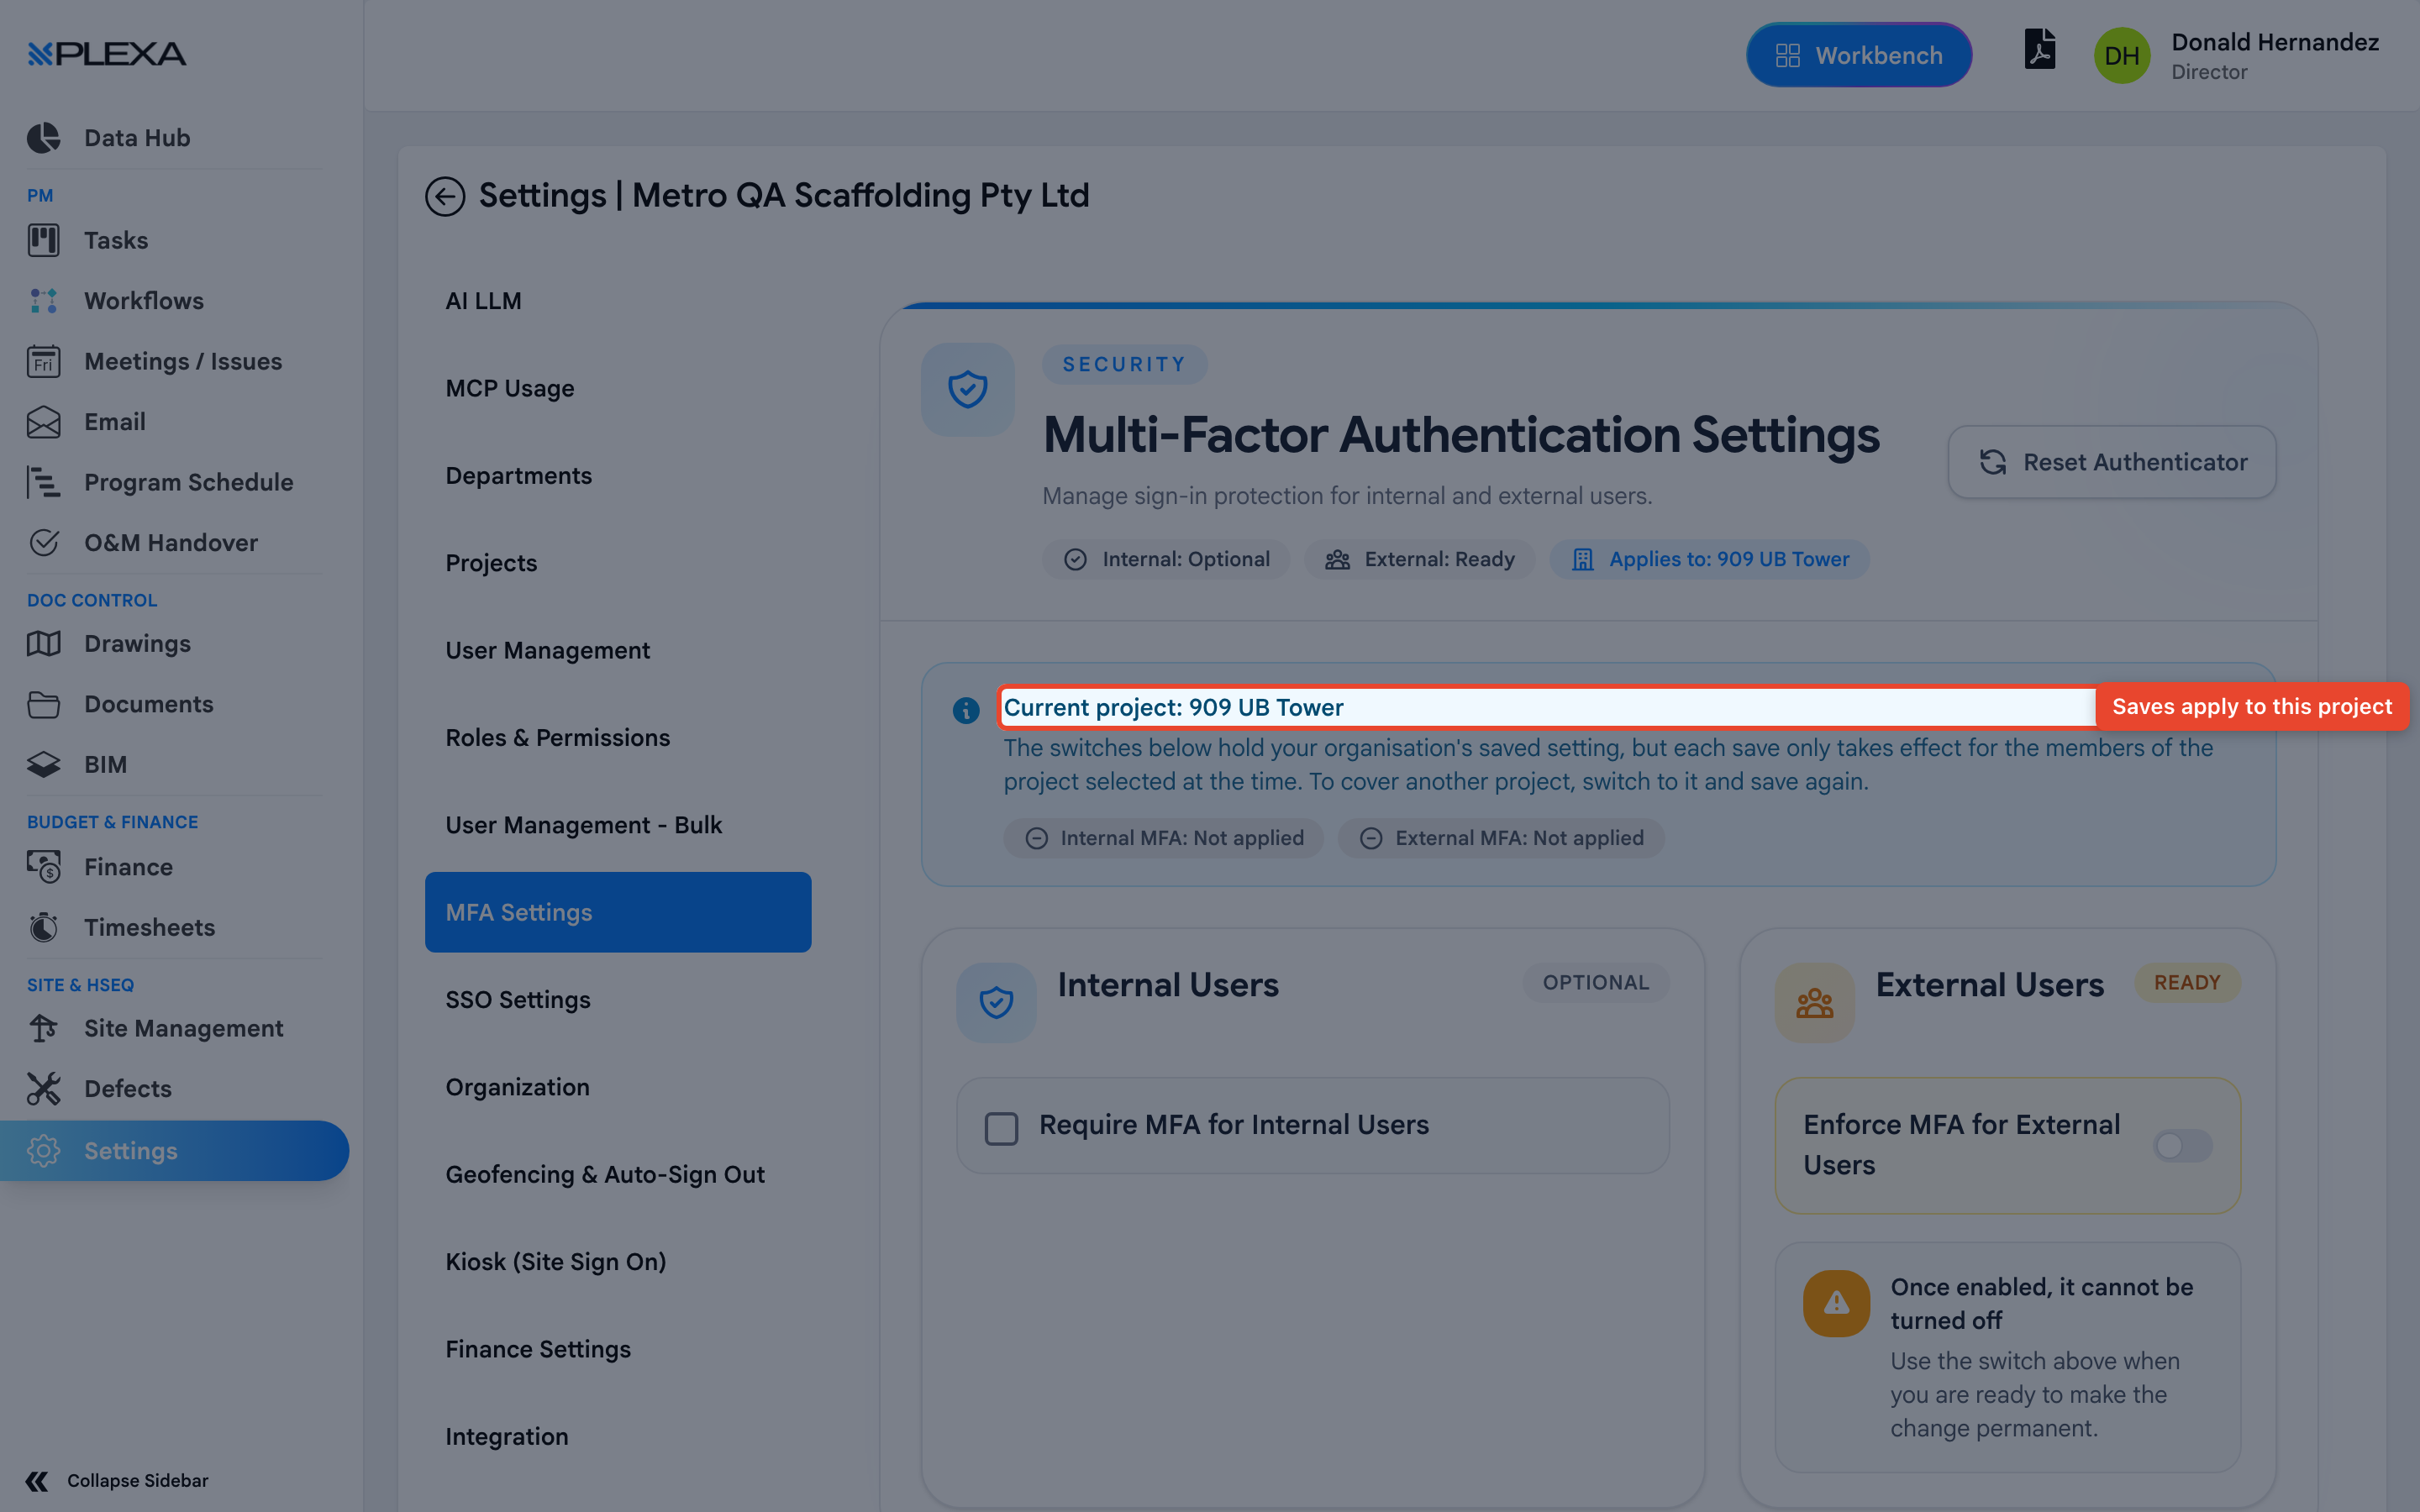
The page shows "Applies to" and "Current project" at the top, along with whether MFA is currently applied, so you can confirm what you are about to change before saving.
Notes & Recommendations
- Enrol before you need to. Setting up an authenticator app at the gate on a bad signal is nobody's idea of a good morning
- Recovery codes are shown once. If you lose both your device and your codes, an Admin has to reset your enrolment
- Signing in with Microsoft follows your organisation's Microsoft policy rather than Plexa's — if Microsoft already asks you for a second factor, that is the one that applies
- Admins: roll MFA out project by project and confirm the status line reads as expected before saving
Need More Support?
For Individual requests related to using Plexa Tools, Contact PLEXA SUPPORT
Email: support@plexapro.com
Phone: 1300 117 140
We're here to help you get the most out of Plexa.